Beginner’s Guide to Wing Selection for Light Winds

wing foil selection low wind

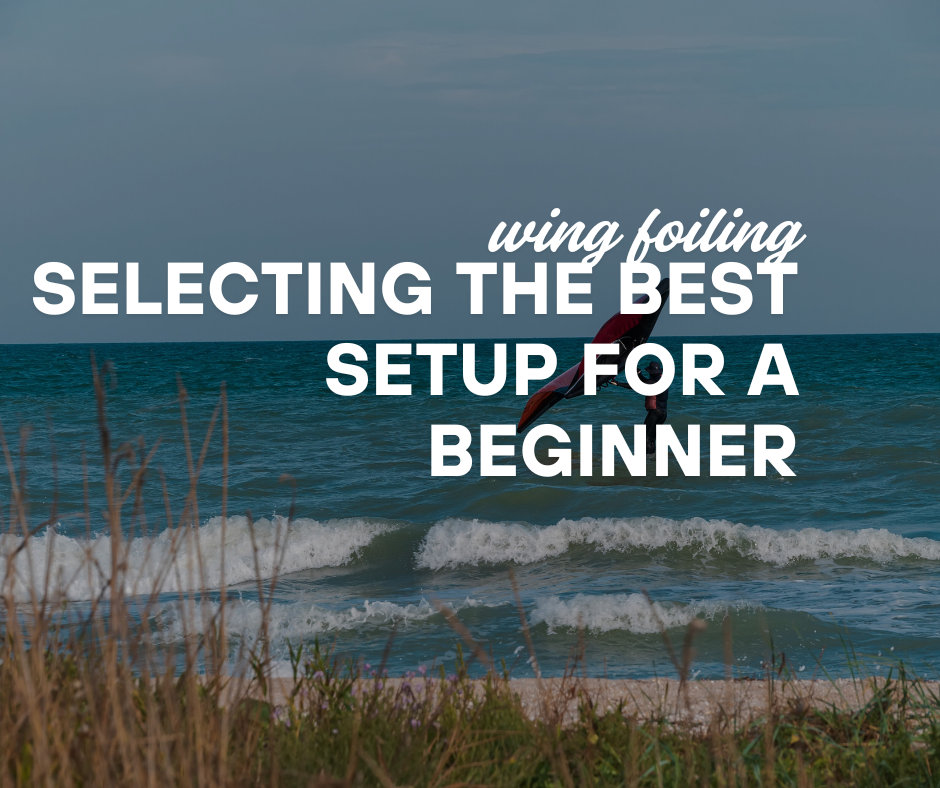
Wing foiling has taken the watersports world by storm, but selecting the right gear can be a daunting task—especially for beginners planning to tackle light wind conditions. Let’s consider the example of an athletic beginner who weighs 210 lbs (95 kg), stands 6’4″ (194 cm), and is starting out with limited experience in water sports. Their primary goal is to wing foil in winds around 10 knots. What would be the ideal setup for someone like this?

Wing Size: Bigger Isn’t Always Better

In light wind conditions, having a larger wing is crucial for generating enough power to get up and stay on the foil. For an individual of this size and weight, the Gong Superpower 9m could be a viable option, offering the extra surface area necessary for lower wind speeds. However, a slightly smaller wing like the Gong 7.5m might also work, depending on local wind consistency and personal preferences.

While larger wings may feel cumbersome to learn with, they can provide better long-term versatility in light winds. Beginners should also factor in that larger wings require more effort to handle, so the trade-off is between ease of use during learning and maximizing utility for future sessions.

Board Selection: Prioritize Stability

For someone new to wing foiling, a board that offers plenty of buoyancy and stability is essential. Boards with a volume of 120-135 liters, such as the Gong HIPE 135L, are excellent beginner choices. These boards are wide enough to support balance during the initial learning phase while still being suitable for progression.

Another option to consider is a downwind board like the Gong Cruzader, which is long, skinny, and designed to excel in low wind. Although downwind boards can be less stable when standing, their design makes it easier to generate speed and lift onto the foil once the basics are mastered.

Foil Setup: Go Big for Beginners

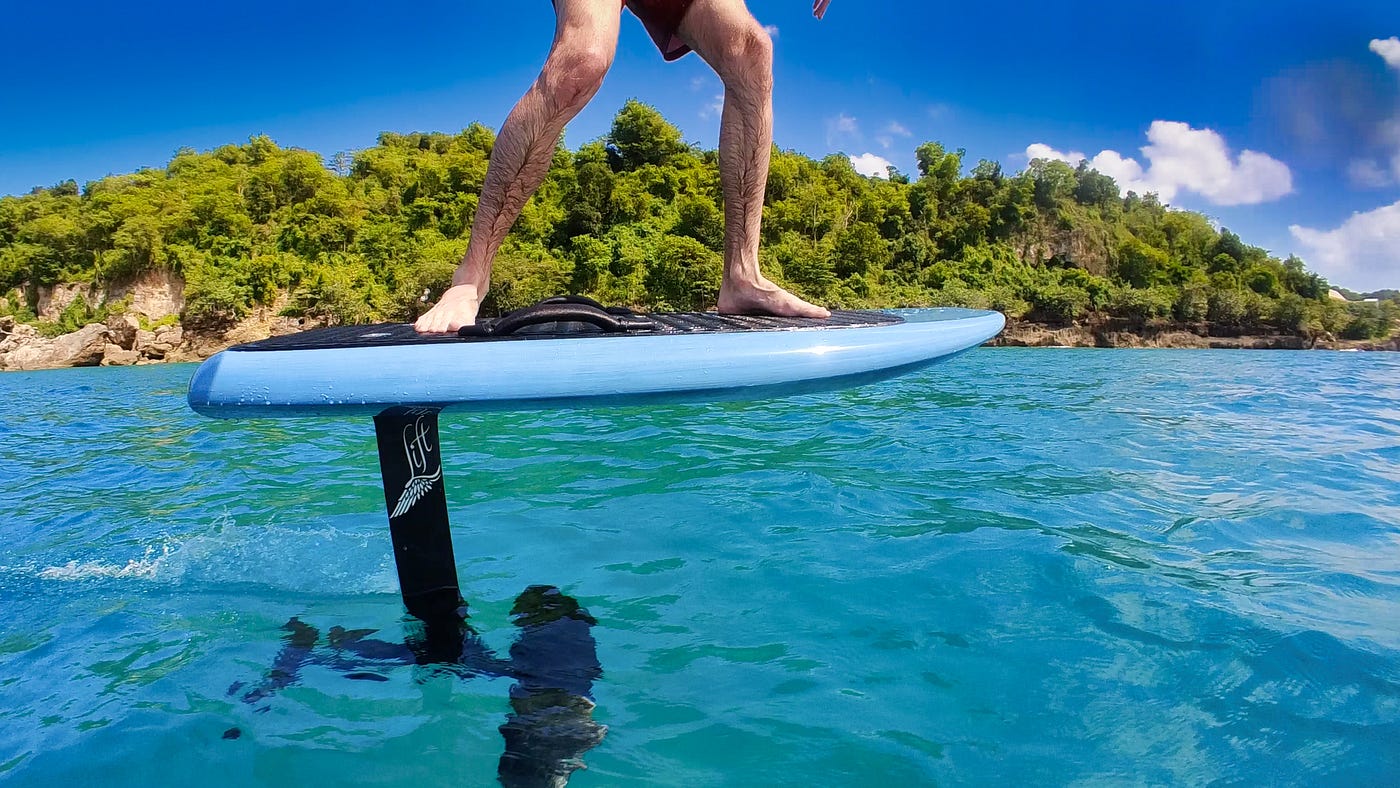
A larger foil with a high surface area, such as the Gong XXL X-Over or similar beginner-oriented foils, is key for learning in light winds. These foils provide more lift at lower speeds, making it easier to get up on the foil and stay there. While advanced foils are smaller and faster, starting with a larger, lower-aspect foil ensures more time on the water, which is critical for building skills.

Adjust Expectations for Light Wind Learning

Learning to wing foil in 10 knots is achievable but challenging, especially for beginners. Consistent wind is a must, as gusty conditions make staying on the foil nearly impossible. Beginners should prepare for a steep learning curve and prioritize time on the water over trying to master advanced techniques too early.

The Cheat Code: Pump Foiling and Multi-Purpose Gear

For locations with frequent light winds, incorporating pump foiling into the training regimen can increase overall water time. Using a large foil like the Gong Curve H 5XL for flat-water paddle-ups can help develop balance and familiarity with foil dynamics.

Additionally, gear like a downwind board provides multi-sport functionality, allowing users to experiment with other disciplines, such as flat-water paddle-ups, when wind conditions aren’t ideal.

Make the Most of Your Wing Foiling Journey

For those who are serious about getting into wing foiling, learning at a location with consistent wind can accelerate progress. For example, the Sea of Cortez in Baja, California, offers excellent conditions for wing foiling beginners. Palapas Ventana’s wing foiling adventure packages provide expert coaching, quality gear, and ideal conditions to get started.

Explore detailed wing foiling tips and insights on light wind setups at ventanatravel.com. For more about the Baja experience, read our guide to wing foiling adventures in La Ventana.

By selecting the right gear and managing expectations, beginners can unlock the joy of wing foiling—even in light wind conditions.

Discover the Thrill of Wing Foiling and Kiteboarding in La Ventana

wing foil lessons la ventana baja mexico

La Ventana, a charming coastal town nestled along the Sea of Cortez in Baja California Sur, is a world-class destination for wind sports enthusiasts. With its consistent winds, warm waters, and breathtaking scenery, it’s the perfect place to learn and master wing foiling and kiteboarding. Whether you’re a total beginner or looking to refine your skills, La Ventana offers the ultimate playground for wind-powered adventures. And the best part? We’re here to guide you every step of the way with expert lessons, full-service support, and unforgettable experiences.

Why La Ventana?

La Ventana’s steady El Norte winds make it one of the top spots in the world for wind sports. From November through March, the conditions are ideal for wing foiling and kiteboarding, with wind speeds perfect for beginners and advanced riders alike. The bay’s wide-open spaces and calm launch areas create a safe and stress-free environment to practice and play. Plus, the crystal-clear waters and stunning desert landscapes add a touch of magic to every session.

What We Offer

We specialize in providing everything you need to have a seamless and exhilarating wind sports experience. Here’s how we make your journey unforgettable:

1. Professional Lessons
Our expert instructors are passionate about sharing their love for wing foiling and kiteboarding. Whether it’s your first time or you’re transitioning to advanced techniques, our personalized lessons ensure you’ll progress quickly and safely. With patient guidance and top-notch equipment, we’ll have you riding the wind in no time.

2. Launch and Land Support
We understand that the technical aspects of wind sports can be intimidating at first. That’s why we provide full launch and land support, ensuring your sessions are as smooth as the Sea of Cortez itself. Our team is always on hand to assist with setup, launching, and landing, giving you the confidence to focus on having fun.

3. Epic Downwinders
For those ready to take their skills to the next level, our downwinders are an absolute must. Imagine gliding effortlessly along the coastline, with the wind at your back and miles of unspoiled beauty stretching ahead. These guided adventures are designed to elevate your skills while showcasing the stunning surroundings of La Ventana.

4. Full-Service Convenience
From equipment rentals to on-site amenities, we’ve got you covered. Our full-service approach means you can focus on enjoying the experience while we handle the logistics. After a day on the water, unwind at our facilities or explore the vibrant local community. From delicious meals to cozy accommodations, La Ventana offers a perfect blend of adventure and relaxation.

Beyond the Water

La Ventana isn’t just about wind sports; it’s a destination brimming with charm and natural beauty. Spend your evenings savoring fresh seafood at local restaurants, soaking in stunning sunsets, or enjoying the laid-back vibe of this coastal paradise. For those seeking more adventure, activities like snorkeling, paddleboarding, and hiking are all within reach.
Ready to Ride?

Learning to wing foil or kiteboard in La Ventana isn’t just about mastering a new skill—it’s about discovering a new passion and embracing the thrill of the wind and sea. With our comprehensive lessons, dedicated support, and an unforgettable location, there’s no better place to start your wind sports journey.

So, what are you waiting for? Join us in La Ventana and experience the ride of your life. Adventure is calling, and the wind is waiting for you!

How to Teach Kids Wing Foiling

How to Teach Kids Wing Foiling baja california sur mexico

Wing foiling can be an incredible activity for kids, blending adventure, physical activity, and a connection to nature. With the right approach, equipment, and guidance, kids can learn safely while having a great time on the water.

For a family-friendly destination to introduce your child to wing foiling, consider the La Ventana Foiling Camp. This camp offers professional instruction, beginner-friendly conditions, and all the resources needed to help kids (and adults) enjoy this exciting sport.

Is Wing Foiling Dangerous for Kids?

Like all water sports, wing foiling has some risks. However, with proper safety measures and the right environment, it can be a safe and rewarding experience. Here’s what to keep in mind:

  • Controlled Conditions: Choose locations with calm waters and light winds to minimize challenges.
  • Safety Equipment: Always use helmets, life jackets, and leashes.
  • Close Supervision: Kids should be monitored by adults or trained instructors at all times.

How to Teach Kids Wing Foiling

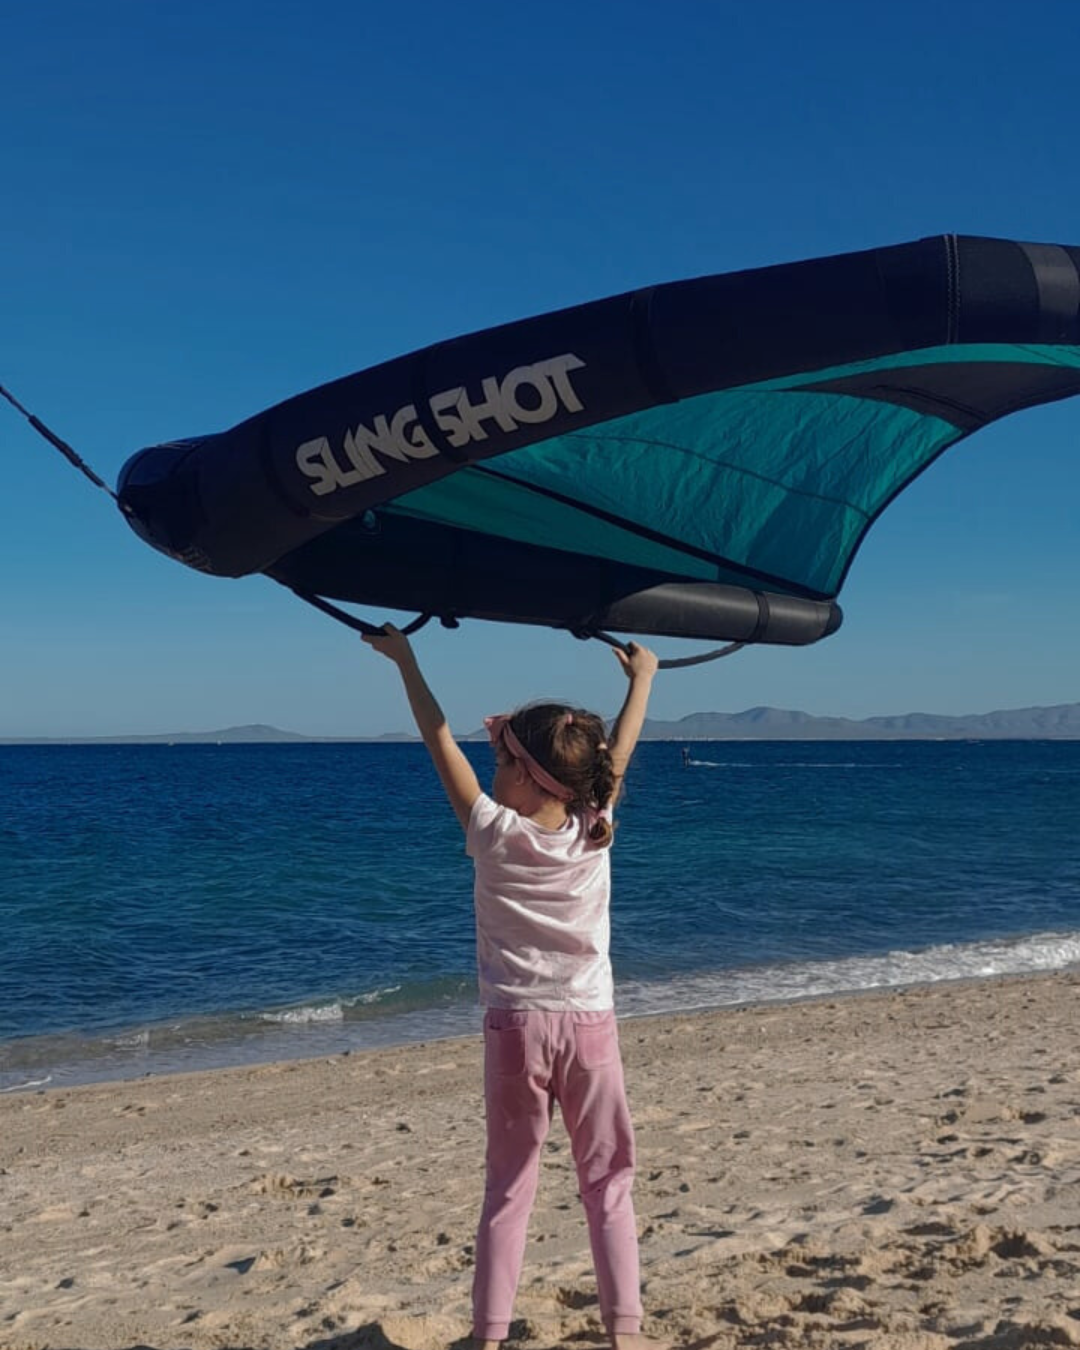
  1. Start on Land: Familiarize them with the wing by practicing handling and balance on solid ground.
  2. Use Beginner-Friendly Equipment: Opt for a stable board and a small, lightweight wing suited to their size.
  3. Progress Slowly: Begin in shallow, calm water and let them build confidence step by step.
  4. Professional Lessons: Certified instructors can provide a structured and safe learning environment.

Recommended Gear for Kids

  • Wing: Choose a 2–3 square meter wing, which is manageable for younger learners.
  • Board: A larger, stable board (over 120 liters) ensures easier balancing.
  • Safety Gear: Invest in a comfortable helmet, impact vest, and leash for added safety.

Ideal Age Groups and Skill Levels

  • 8–12 Years Old: A great age range for starting, as kids at this stage often have the coordination and enthusiasm to learn.
  • Teens: Older children can advance more quickly, handling smaller boards and wings with ease.
Additional Considerations

  • Swimming Skills: Kids should be confident and capable swimmers before learning wing foiling.
  • Strength and Endurance: The sport requires a degree of upper-body strength and stamina, so assess their readiness.
  • Patience: Wing foiling is challenging at first, so encourage them to enjoy the process without rushing.

For families looking to explore wing foiling together, La Ventana Foiling Camp offers a full-service experience with expert instruction, stunning conditions, and a welcoming atmosphere. It’s a perfect place to spark a lifelong love for this exciting sport.
The Art of Catamaran Sailing: Tips, Maintenance, and Best Practices

sailing catamaran best type ventana travel

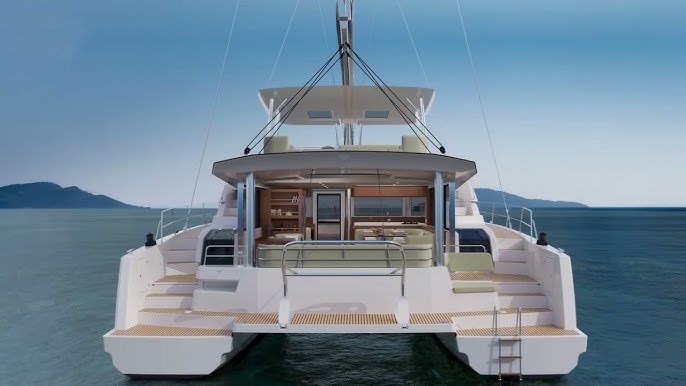
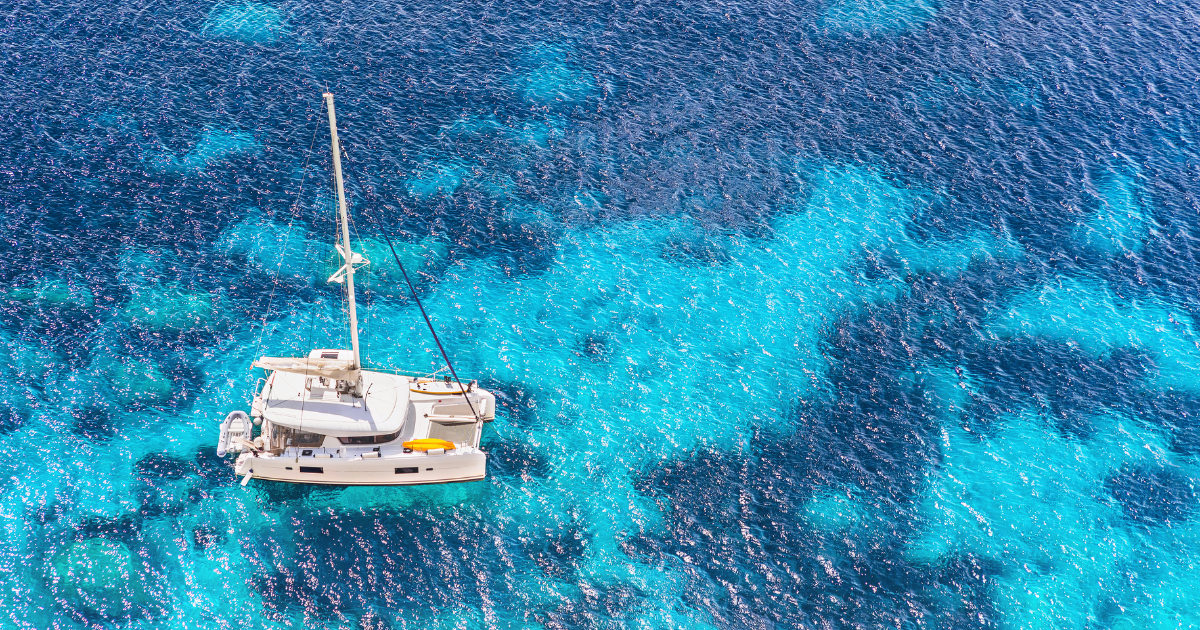
Sailing a catamaran offers a unique mix of comfort, performance, and adventure. These versatile vessels are ideal for everything from serene family cruises to high-octane wind-sports adventures. Whether you’re choosing a catamaran for the first time or are a seasoned sailor, here’s a comprehensive guide on tips, maintenance, longevity, brands, and trip planning to get the most out of your vessel.


Key Sailing Tips

  1. Understand Weight Sensitivity
    Catamarans are more weight-sensitive than monohulls. Even distribution of gear and passengers ensures optimal performance and avoids unnecessary strain on the structure.
  2. Perfect Your Docking Skills
    With two engines, catamarans allow for precise maneuvering. Practice pivoting on the spot, as it’s a hallmark feature of these vessels.
  3. Adjust Sail Trim for Comfort and Speed
    The wide stance of a catamaran can make it prone to slamming in heavy seas. Adjust your sail trim to keep the bows slightly elevated.
  4. Choose Your Route Wisely
    Catamarans excel in coastal cruising but are also capable of ocean crossings. Their shallow draft allows exploration of secluded bays and coves.

Maintenance for Longevity

  • Inspect Regularly: Check rigging, rudders, and through-hull fittings frequently. Saltwater accelerates corrosion, so freshwater rinses are essential.
  • Focus on the Bridgedeck: The area between the hulls is prone to wear due to wave impact. Reinforce and repair as needed to maintain durability.
  • Sail Care: UV exposure and chafe are the main enemies of sails. Use sail covers and inspect them regularly for tears or wear.
  • Engines and Systems: Diesel engines need routine servicing, especially if your catamaran has been used heavily in the charter market.

Choosing the Right Brand

  • Luxury Cruisers: Brands like Lagoon and Bali offer spacious interiors ideal for charters or family vacations, though they’re sometimes criticized as “floating Winnebagos.” Learn more about selecting the best family-friendly catamaran in this detailed blog.
  • Performance-Oriented: Outremer and Catana cater to sailors who prioritize speed and sailing performance.
  • Bluewater-Ready: Models like the Privilege and Antares are solid, seaworthy options for long-term cruising.
  • Eco-Friendly Innovations: Consider brands like Vaan or Garcia for their emphasis on sustainability and durability.

Planning Your Catamaran Adventure

For a truly immersive experience, consider curated trips like those offered by Ventana Travel. Their Sea of Cortez adventures aboard luxury catamarans feature endless downwinders, snorkeling, paddleboarding, and private chef-prepared meals. Learn more at Ventana Travel to find the perfect itinerary for your sailing dreams.

Final Thoughts

Catamarans offer unparalleled versatility, blending adventure with comfort. By focusing on proper maintenance, choosing the right model, and planning well, you can enjoy a vessel that lasts decades. As a sailor once wisely said, “If it’s built for the Caribbean charter market, it’s a floating Winnebago,”—so choose wisely and sail boldly!

Saltwater Fly Fishing Tips and Advice

salt water dorado fly fishing baja california sur

So you want to dive into saltwater fly fishing? Transitioning from freshwater to saltwater offers exciting challenges and rewards. Here’s some advice tailored to your salt water setting and your questions about tippets and leaders:

Leaders and Tippets

  1. Leader Setup:
    • Use tapered leaders around 9-12 feet, starting with 20-40 lb test depending on target species.
    • Add a bite tippet (30-50 lb fluorocarbon) for fish with sharp teeth like barracuda or tarpon. For smaller fish, a 12-20 lb fluorocarbon tippet works well.
    • Knot suggestions: Double uni-knot or loop-to-loop connections for strength and versatility.
  2. Fluorocarbon vs. Monofilament:
    • Fluorocarbon is more abrasion-resistant and nearly invisible underwater, great for clear flats.
    • Monofilament is less expensive and easier to tie but less durable against sharp objects like coral or oyster beds.
  3. Bite Protection:
    • Use bite wire (e.g., titanium or nylon-coated) if targeting species like bluefish or barracuda.
    • Always carry pre-tied leaders in case you need a quick swap.

Essential Techniques and Tips

  1. Casting in Wind:
    • Practice your double haul to achieve distance and accuracy.
    • Learn to cast off-shoulder and backhand for days when the wind isn’t in your favor.
  2. Read the Water:
    • Learn to identify rips, seams, and troughs. These often hold baitfish and predators.
    • Look for diving birds, nervous water, or flashes indicating feeding fish.
  3. Timing and Tides:
    • Fish moving water. Incoming and outgoing tides concentrate baitfish and predators.
    • Early mornings and late afternoons are prime times, especially in clear shallows.
  4. Approach:
    • Be stealthy. Saltwater fish, especially on flats, are wary.
    • Wear muted clothing and wade slowly to avoid spooking fish.
  5. Fly Selection:
    • Simple baitfish patterns like Clousers (chartreuse/white, tan/white) and Deceivers are staples.
    • Gurglers and poppers are great for topwater action, especially for snook and redfish.
    • Match the size of your fly to the baitfish present in the area.

Safety and Environment

  1. Wading Cautions:
    • Shuffle your feet to avoid stingrays.
    • Invest in quality wading boots for protection from sharp objects like oysters and glass.
    • Be mindful of tides; getting stranded on flats or mud can be dangerous.
  2. Sun Protection:
    • Wear a wide-brim hat, long-sleeve UV shirts, and neck gaiters.
    • Reapply sunscreen often.
  3. Gear Maintenance:
    • Wash all gear thoroughly with fresh water after each outing, as you mentioned. Disassemble reels and pay attention to rod guides.

Bonus Local Tips for Southern Baja

  1. Species Focus:
    • Target snook under mangroves or docks, redfish in grassy flats, and baby tarpon in creeks and canals.
    • Seasonal migratory species, like permit or bonefish, offer incredible challenges.
  2. Explore Kayak Opportunities:
    • Southern Baja has incredible backwater estuaries. A kayak allows you to access fish-holding waters most anglers can’t reach.
  3. Keep It Simple:
    • Don’t overthink flies. A few well-tied baitfish patterns will catch a variety of species.

Enjoy the saltwater adventure—it’s a thrilling and rewarding challenge!

Best Concert Venues in Europe 2025

concert amsterdam ventana travel

Here’s a curated list of some of Europe’s best concert venues, incorporating nearby lodging, food, pubs, and natural attractions for hikes, based on your interests. These are a mix of intimate and larger venues with noteworthy city or natural experiences.


1. Ziggo Dome – Amsterdam, Netherlands

  • Capacity: 17,000
  • Why Visit: Modern acoustics and atmosphere. Amsterdam offers vibrant cultural and culinary experiences.
  • Nearby Lodging:
    • Hotel Jakarta: Eco-friendly with river views and great amenities.
    • citizenM Amsterdam: Stylish, budget-friendly.
  • Food & Pubs:
    • Foodhallen: A trendy indoor food market.
    • Proeflokaal Arendsnest: Known for Dutch craft beers.
  • Hiking & Nature:
    • Amsterdamse Bos: A lush park with walking trails and lakes.
    • Short train rides to Zandvoort Beach or Utrechtse Heuvelrug National Park.

2. Sportpaleis – Antwerp, Belgium

  • Capacity: 23,000
  • Why Visit: A classic venue for big-name performances, paired with Antwerp’s historic charm.
  • Nearby Lodging:
    • Hotel Julien: Boutique luxury with a rooftop view.
    • B&B Suites@FEEK: Trendy, modern suites near the city center.
  • Food & Pubs:
    • The Jane: Michelin-star dining in a converted church.
    • Kulminator: Legendary beer café.
  • Hiking & Nature:
    • Kalmthoutse Heide: A serene nature reserve with trails, 45 minutes away.
    • Walk along the Scheldt River.

3. Hovet – Stockholm, Sweden

  • Capacity: ~9,000
  • Why Visit: Smaller arena with good acoustics and views. Stockholm offers stunning urban and natural beauty.
  • Nearby Lodging:
    • Hotel At Six: Luxury with contemporary art.
    • Story Hotel Riddargatan: Boutique, trendy vibe.
  • Food & Pubs:
    • Oaxen Slip: Swedish cuisine by the waterfront.
    • Akkurat: Known for craft beer and whisky.
  • Hiking & Nature:
    • Explore Djurgården Island’s trails.
    • Day trip to Tyresta National Park, just 20 km away.

4. O2 Academy – Glasgow, Scotland

  • Capacity: 2,500
  • Why Visit: A historic venue with an intimate atmosphere, Glasgow is known for its lively music scene.
  • Nearby Lodging:
    • Kimpton Blythswood Square: Upscale, centrally located.
    • Grasshoppers Hotel: Cozy and charming.
  • Food & Pubs:
    • Ubiquitous Chip: Iconic Scottish cuisine.
    • The Pot Still: Famous whisky bar.
  • Hiking & Nature:
    • Loch Lomond & The Trossachs National Park: A short drive for iconic Scottish landscapes.
    • Kelvingrove Park for urban strolls.

5. Royal Arena – Copenhagen, Denmark

  • Capacity: 16,000
  • Why Visit: A well-designed venue close to Copenhagen’s cultural attractions.
  • Nearby Lodging:
    • Hotel Sanders: Luxury with Danish hygge.
    • Wakeup Copenhagen: Budget-friendly chic.
  • Food & Pubs:
    • Noma: World-renowned, experimental Nordic dining.
    • Mikkeller Bar: Craft beer mecca.
  • Hiking & Nature:
    • Day trip to Møns Klint: Chalk cliffs with breathtaking trails.
    • Amager Strandpark: Urban beach with coastal paths.

6. Rockhal – Esch-sur-Alzette, Luxembourg

  • Capacity: 6,500
  • Why Visit: A smaller, intimate arena with excellent sound.
  • Nearby Lodging:
    • Mama Shelter Luxembourg: Funky and stylish.
    • Hotel Sofitel Luxembourg Le Grand Ducal: Luxurious with great views.
  • Food & Pubs:
    • Chiggeri: Fusion cuisine with an extensive wine list.
    • The Tube: Relaxed pub atmosphere.
  • Hiking & Nature:
    • Mullerthal Trail: Known as “Little Switzerland,” with lush forests and rock formations.
    • Explore Parc Merveilleux, a mix of nature and culture.

Each venue offers a unique balance of live music, culture, food, and natural beauty for hiking enthusiasts. Let me know which appeals most for more tailored advice!

The Great Eastern European Road Trip with Hiking

eastern european hike women

Last summer a friend and I took a road trip in Eastern Europe, particularly in Slovenia and Czechia. We made some mistakes so you don’t have to! And here are some tips and advice, including some desert hiking tips and more:

Road Trip Tips for Slovenia and Czechia

  1. Plan Your Route in Advance: While Slovenia and Czechia have great infrastructure, make sure to map out your route to avoid detours or road closures, especially during the off-season.
  2. Safety First: Both Slovenia and Czechia are relatively safe for travelers, but it’s always a good idea to let someone know your itinerary and stay in well-populated areas when hiking or exploring more remote regions.
  3. Rent a Reliable Car: Since you’ll be on the road for most of the trip, a sturdy, fuel-efficient car is essential. Ensure the car is equipped for varying weather conditions, especially if traveling in early spring when roads can still be slippery in higher elevations.
  4. Hiking in Slovenia: Slovenia offers many breathtaking hikes, especially in the Julian Alps. The Juliana Trail is a more beginner-friendly, long-distance hiking route that skirts around the dramatic alpine peaks, allowing you to enjoy the stunning scenery without needing alpine skills.
  5. Hiking in Czechia: Czechia’s Bohemian Switzerland National Park is another great hiking destination, with stunning sandstone rock formations, deep forests, and scenic viewpoints. Cesky Raj (Czech Paradise) is also a picturesque area with well-marked trails.

Desert Hiking Tips Adapted for Slovenian and Czech Hikes

While the hiking tips in this article are focused on desert hikes, they can still apply when hiking in forested or mountain areas of Slovenia and Czechia. Here are a few relevant ones:

  1. Stay Hydrated: Just like in the desert, hydration is crucial. Always carry enough water, especially since hiking in remote areas may not have reliable sources.
  2. Pack Light but Smart: Prepare for varied weather conditions. Pack lightweight layers, waterproof gear, and good hiking boots. Early spring conditions can change rapidly, and you may face rain, mud, or even leftover snow.
  3. Know Your Trail: Research your trail beforehand. Even if you’re not going for the peaks, be aware that spring in Eastern Europe can still mean muddy, slippery trails. Stick to marked paths to avoid getting lost.
  4. Time Management: Start your hikes early in the day to ensure you finish before dark. This is especially important in April when daylight hours are shorter.

For more detailed tips on preparing for hikes, you can check out this guide from Ventana Travel.

Where to Stay

  • Slovenia: Ljubljana, Bled, and the Triglav National Park areas offer a range of accommodations, from budget-friendly hostels to boutique hotels.
  • Czechia: Prague and Cesky Krumlov are ideal bases for exploring Czechia, with charming guesthouses and hotels available.

Local Cuisine

  • Slovenia: Don’t miss local dishes like žlikrofi (dumplings) and burek. Traditional Slovenian restaurants often offer cozy atmospheres.
  • Czechia: Try Czech staples like svičková (beef with creamy sauce) or trdelník (a sweet pastry) in local taverns.

For planning and booking, check out Ventana Travel for organized trips or additional ideas. Happy travels!

It’s Time to Kiteboard in Baja: What You Need to Know

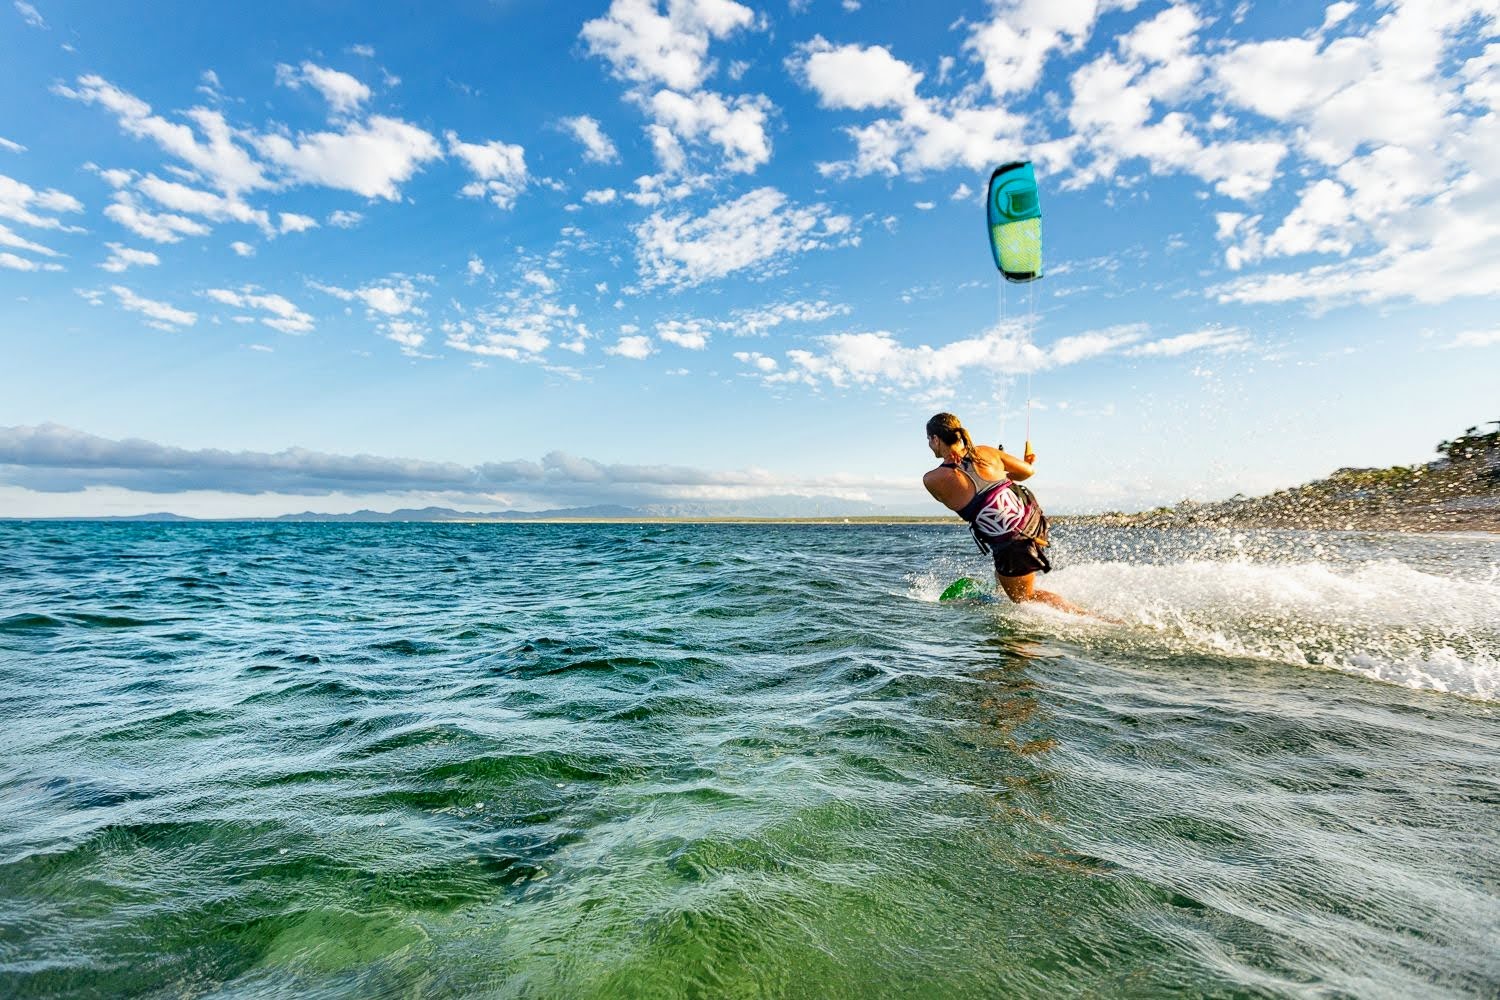
women kiteboarding la ventana baja

As an intermediate kiteboarder exploring Baja, Mexico, there are a few tips to make the most of your kiteboarding experience in places like La Ventana and beyond.

1. Choosing the Right Spot

La Ventana is ideal for intermediate kiteboarders with consistent thermal winds from late October to March. The wide, sandy beaches and side-onshore winds make launching and landing manageable. Avoid rocky spots unless you’re confident in your board skills.

For exploring other locations in Baja, consider Los Barriles for similar conditions, while the East Cape and Cabo Pulmo may offer more challenging wave conditions, so it’s best to ride these areas with more experience or guidance.

2. Wind Forecasting

Wind in La Ventana is thermal, which means it typically builds throughout the day. Pay attention to the afternoon winds, as they can either ramp up quickly or drop off, leaving you stranded. MasViento on Facebook is a great source for local wind patterns in La Ventana, alongside reliable sources like iKitesurf.

3. Improving Technique

If you’re working on body dragging or practicing advanced maneuvers, lessons with jet ski support are invaluable. They help you get back on track faster and give you confidence in deeper water. For reliable, female-friendly lessons with safety support, I highly recommend the experienced instructors at Palapas Ventana. They can tailor lessons for intermediate riders looking to progress. Here’s a link to more info on kiteboarding lessons in La Ventana.

4. Safety and Preparation

While you may want to push your limits, Baja’s conditions can be unpredictable. Always have a safety plan, especially if you kiteboard in more isolated areas. Check the gear before heading out, and carry a phone in a waterproof pouch if you’re venturing far from shore. It’s also a good idea to connect with locals about the day’s conditions before riding.

5. Connect with the Community

The kiteboarding community in Baja is warm and supportive. Don’t hesitate to ask for tips on the beach or recommendations for gear or dining spots. You might even find a group to kite with for safety and fun.

Baja offers excellent kiteboarding with the perfect blend of wind, landscape, and adventure for intermediate kiteboarders—just make sure you’re prepared for the thermal winds and enjoy the ride!

So You Want to Get Into Fly Fishing: Here’s Some Reel Advice

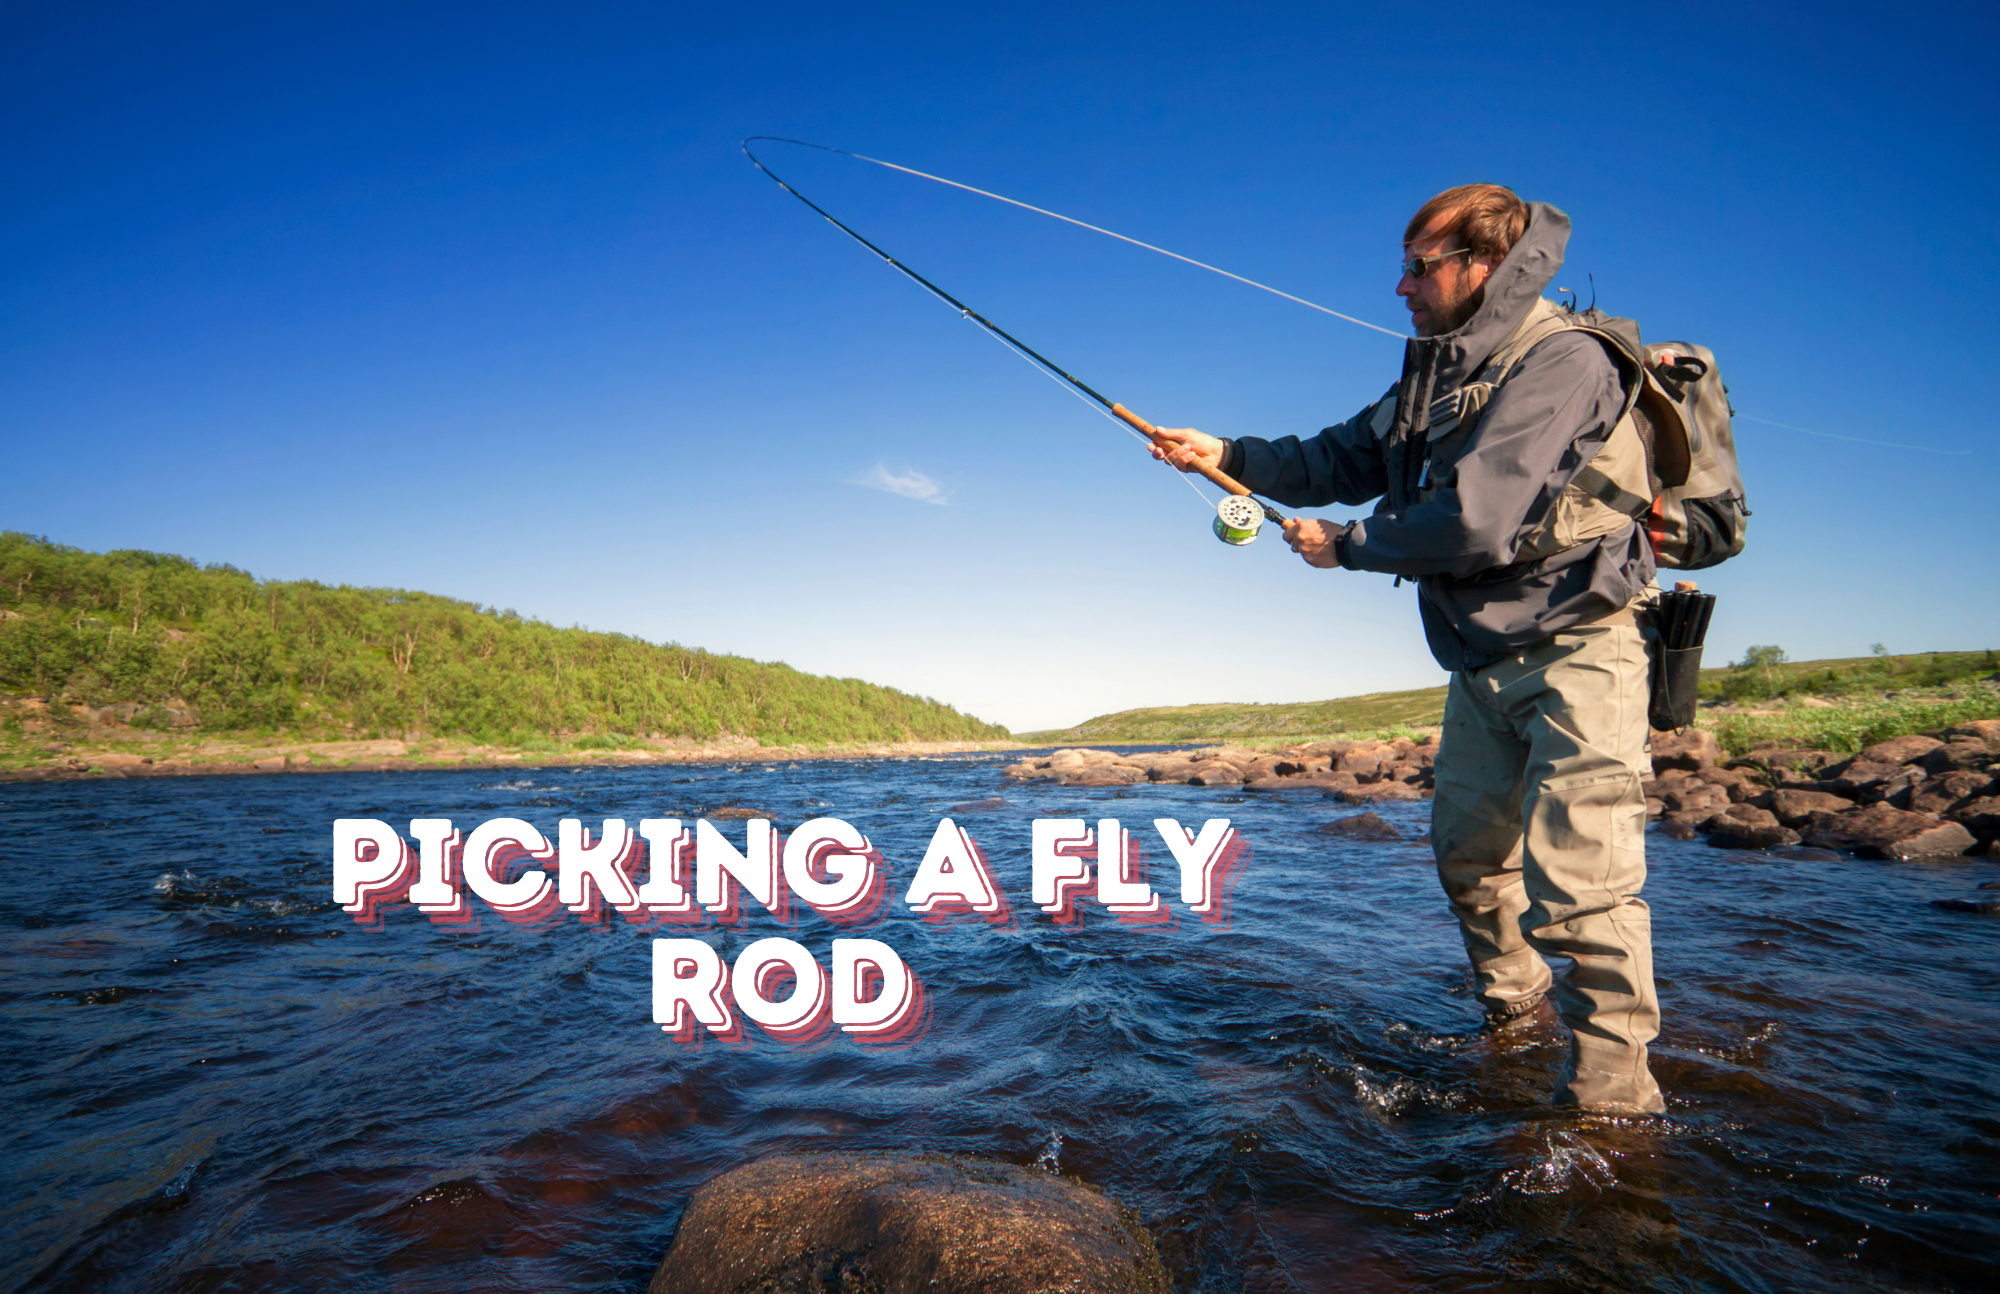
how to choose a fly rod fly fishing beginners

OK, you saw A River Runs Through It and you want to get into fly fishing, but where to start?

For beginners looking for a great fly fishing reel, here’s some advice:

  1. Lamson Liquid Reel: You can find older models of the Lamson Liquid for under $100, which is an excellent value. It’s known for its durability and smooth performance, making it ideal for beginners.
  2. Invest in Fly Line: Many anglers recommend spending more on high-quality fly line rather than the reel itself. Options like Orvis Pro Trout or Scientific Anglers Amplitude are popular for improving casting consistency and line management.
  3. Reel Function: For lighter rods (5 wt or below), the reel is mostly a line holder, so you don’t need to break the bank on it. Instead, focus on the rod and line for a better overall experience.
  4. Alternative Budget Reels: If you’re looking for cheaper alternatives, the Piscifun Sword reel offers great value for around $60. You can also find used reels on platforms like eBay.

For an exciting fly fishing experience, check out this fly fishing trip in Magdalena Bay, Baja, Mexico with Ventana Travel. This trip offers incredible fishing opportunities in mangroves and open waters.

Also, learn from mistakes by reading this fly fishing experience gone wrong—an example of what not to do on a fishing trip!

Wine Location Rankings 2024

Rhône Valley, France wine country

Whew! After a year of intense travel, I finally made the definitive (at least in my book), wine tasting location ranking. Here’s a ranking of the best places to go for wine, including recommendations for local restaurants and places to stay near each area:

1. Piedmont, Italy

  • Why go: Piedmont offers stunning vineyards and a deep history of winemaking, with plenty of budget-friendly options outside Barolo.
  • Stay: Opt for accommodations in Dogliani, like the cozy Borgo di Rivalta, where you can find entire homes for around $35/night.
  • Eat: Head to Trattoria della Posta in Monforte d’Alba for traditional Piedmontese dishes, paired with local Barolo wines.
  • Wine Highlight: Barolo and Barbaresco are must-tries.

Wine tasting in Provence – Brad & Angelina’s Estate

2. Rhône Valley, France

  • Why go: Affordable and full of variety, Rhône is famous for its Côtes du Rhône wines, and tastings are often free in regions like Gigondas.
  • Stay: Les Florets in Gigondas offers a charming stay with vineyard views, ideal for those looking to immerse themselves in local culture.
  • Eat: L’Oustalet in Gigondas serves exquisite dishes, blending Provençal flavors with the region’s finest wines.
  • Wine Highlight: Grenache-based wines are the stars here, but also look for Châteauneuf-du-Pape whites.

3. Alsace, France

  • Why go: Known for friendly winemakers and beautiful landscapes, Alsace is an enchanting region for wine lovers.
  • Stay: Book a charming room at La Maison des Têtes in Colmar, a perfect base for exploring the Route des Vins.
  • Eat: Dine at Wistub Brenner, where traditional Alsatian dishes meet Riesling and Gewürztraminer pairings.
  • Wine Highlight: Rieslings and Gewürztraminers, paired with the region’s rich, flavorful cuisine.

4. Beaujolais, France

  • Why go: A more relaxed and tourist-friendly region compared to its neighboring Burgundy, Beaujolais is affordable and scenic.
  • Stay: Château de Pizay offers beautiful accommodations surrounded by vineyards.
  • Eat: Auberge du Cep in Fleurie is a fantastic spot for local cuisine, paired with the fresh and fruity Beaujolais wines.
  • Wine Highlight: Light, vibrant Beaujolais Nouveau and the more structured Cru Beaujolais.

5. Moselle Valley, Germany

  • Why go: Astonishing landscapes and excellent value for high-quality Rieslings.
  • Stay: Hotel Villa Hügel in Trier offers modern luxury with easy access to local wineries.
  • Eat: Enjoy traditional German fare at Weinstube Kesselstatt in Trier, paired with superb local Rieslings.
  • Wine Highlight: Rieslings dominate, ranging from dry to sweet styles.

6. Languedoc-Roussillon, France

  • Why go: Dirt cheap, with vast wine options and many lesser-known gems.
  • Stay: Try Les Jardins de Saint-Benoît, nestled in the heart of the region, offering a peaceful and scenic retreat.
  • Eat: Auberge de l’Ecole in Saint-Guilhem-le-Désert offers hearty local cuisine.
  • Wine Highlight: Explore Carignan and Grenache-based blends, and keep an eye out for organic producers.

7. Georgia

  • Why go: An ancient wine region with hospitable locals and unique winemaking traditions.
  • Stay: Stay in a local guesthouse in Sighnaghi for an authentic experience.
  • Eat: Pheasant’s Tears restaurant offers delicious Georgian food paired with their famous qvevri wines.
  • Wine Highlight: Try wines made using the traditional qvevri method, especially the amber wines.

8. Cape Winelands, South Africa

  • Why go: Affordable with breathtaking landscapes and top-quality wines.
  • Stay: Babylonstoren, a luxury farm hotel, is a perfect escape in the heart of the wine region.
  • Eat: Dine at The Tasting Room at Le Quartier Français in Franschhoek for creative dishes paired with local wines.
  • Wine Highlight: Chenin Blanc and Pinotage are the stars of South African wine.

9. Paso Robles, California, USA

  • Why go: Great value for high-quality Rhône varietals, with a laid-back, unpretentious atmosphere.
  • Stay: Hotel Cheval offers boutique accommodations in the heart of Paso Robles.
  • Eat: The Hatch serves up great comfort food with a wine list that features local favorites.
  • Wine Highlight: Rhône blends, especially Grenache and Syrah.

10. Mendoza, Argentina

  • Why go: Argentina’s wine capital offers stunning mountain views and world-class wines at a fraction of European prices.
  • Stay: Casa de Uco Vineyards & Wine Resort is an intimate stay surrounded by vineyards.
  • Eat: 1884 Restaurant by Francis Mallmann offers incredible Argentinian cuisine paired with Malbecs.
  • Wine Highlight: Malbec reigns supreme, but don’t miss out on Cabernet Franc or Torrontés.

These regions are perfect for an unforgettable wine journey with your friend, filled with local charm, great food, and plenty of tastings!

Fly Fishing Experience Gone Wrong: An Example of What Not To Do

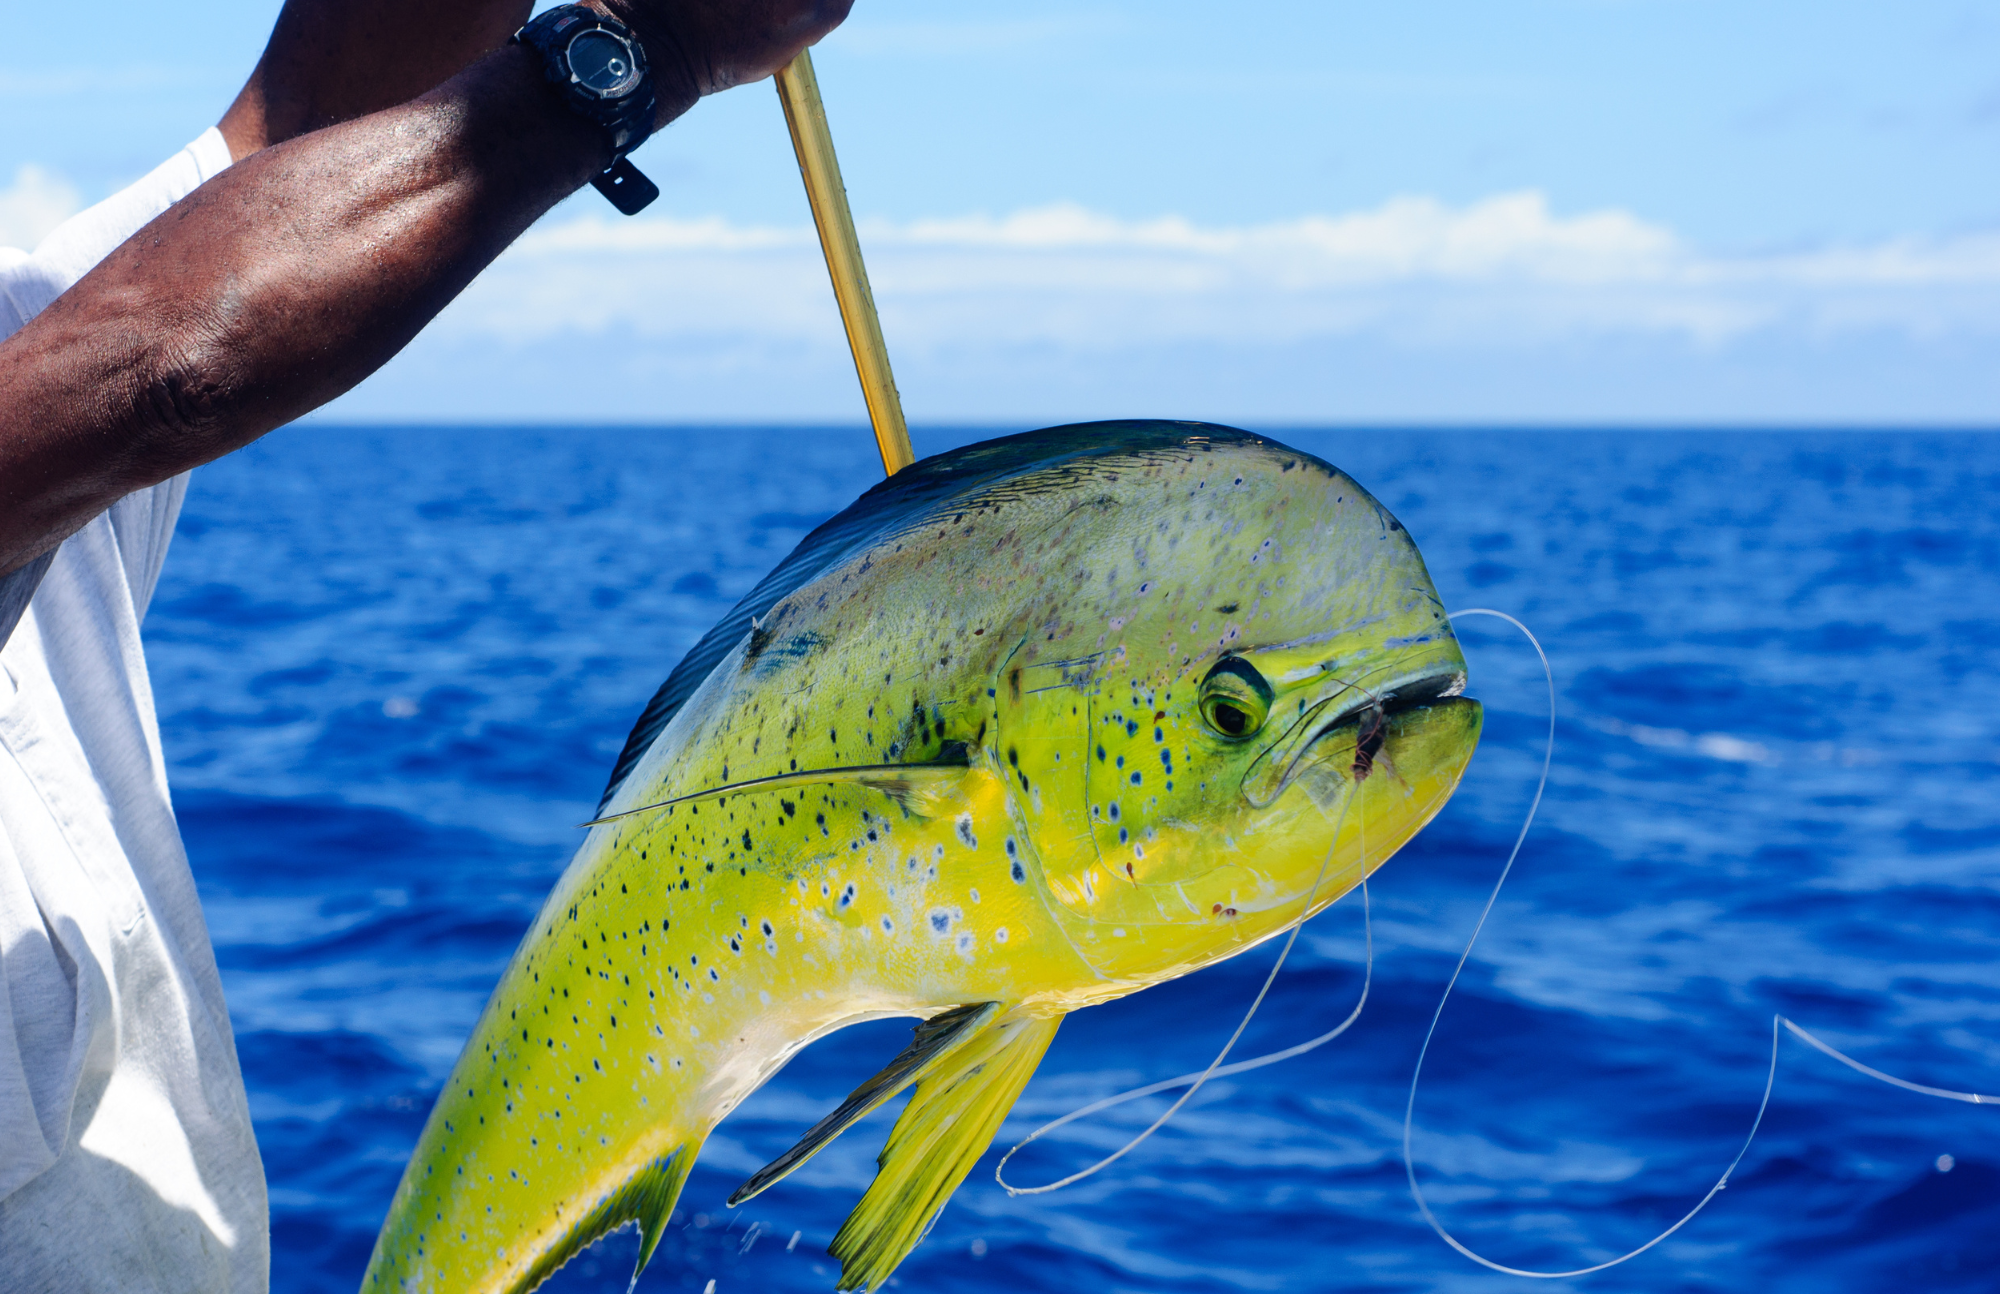
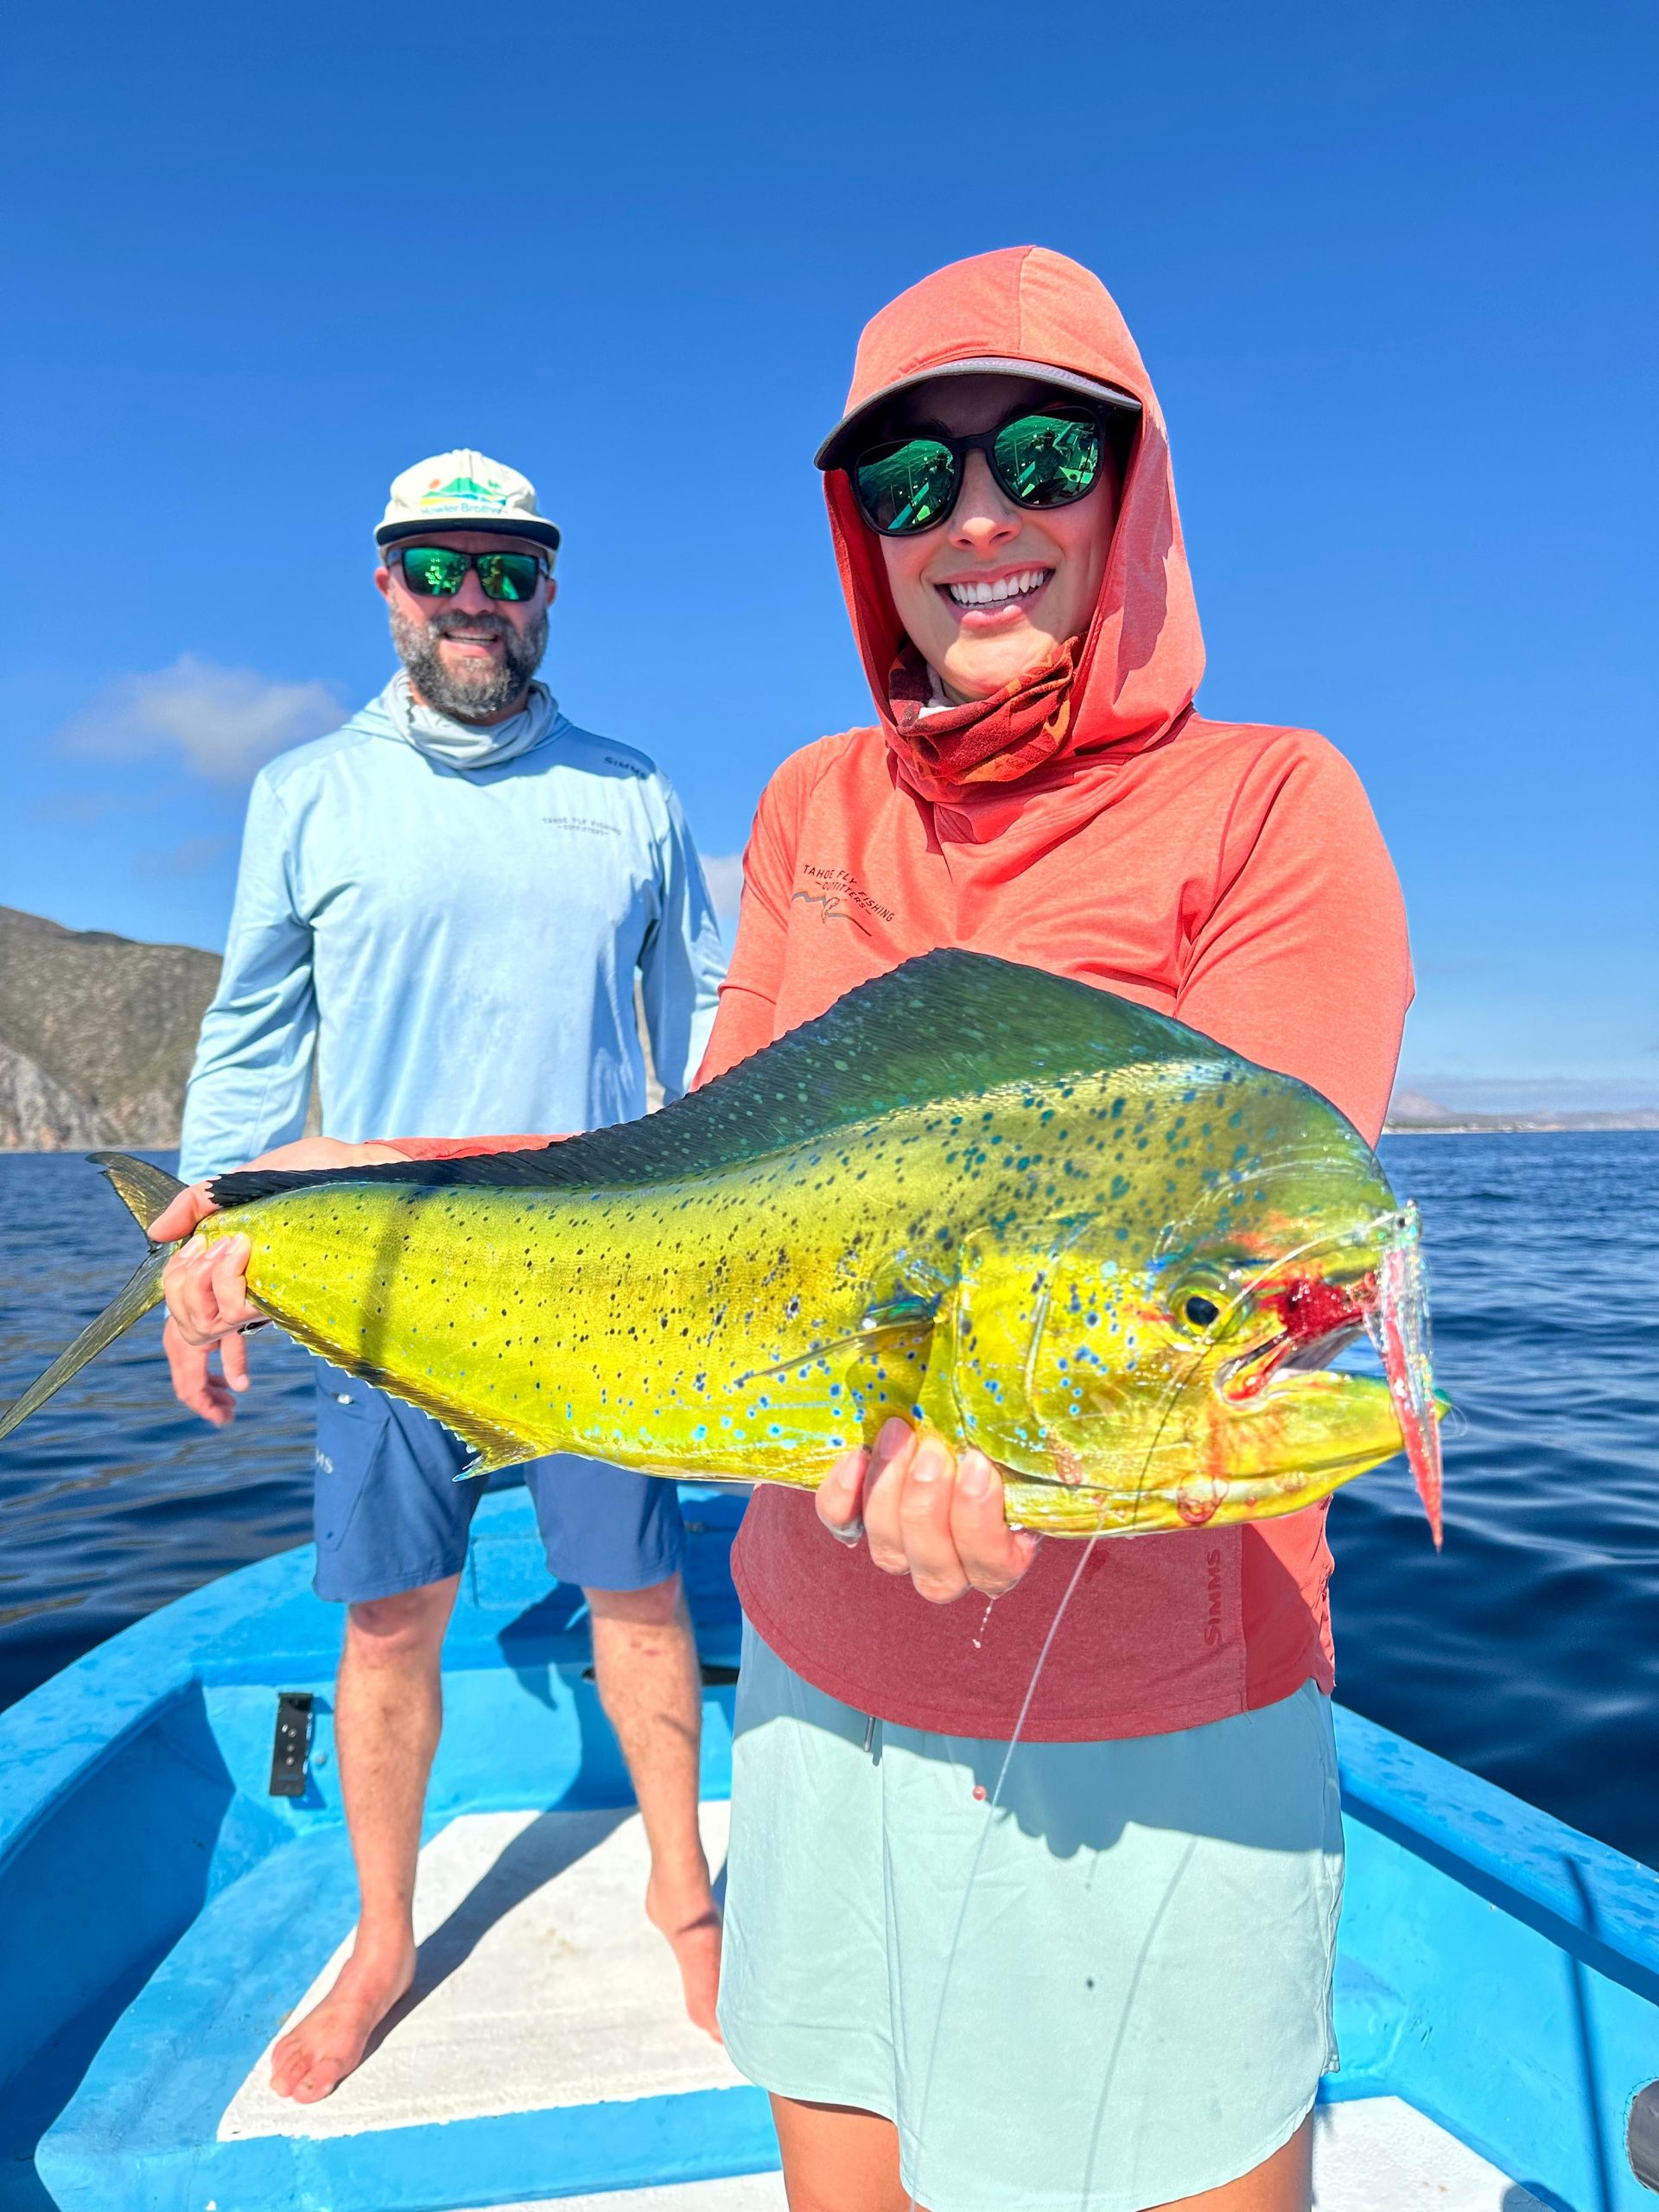
mahi mahi dorado fly fishing

My friend had been in touch with a guide in La Paz through phone and text to purchase a casting deck for a skiff, and the plan was to drive down and pick it up. The guide kindly offered to take us fly fishing for half price, saying, “I’m slow, and since you’re buying the deck, let’s go fly fishing!” We were thrilled and eager for the day ahead.

When we arrived, however, we were met with a surprise: the guide had laid out 20 spinning rods on his Maverick. This wasn’t what we had expected, as we’d brought our own fly rods. But we decided to roll with it and got on the boat anyway. After about 15 minutes on the water, the guide abruptly turned the boat around, saying, “This place isn’t good today,” and asked us to follow him down north in our truck.

After trailering the boat, we followed him north, where he relaunched the skiff and took us fishing for about two hours. Midway through, he got caught up in a phone conversation and suddenly headed to his attorney’s office, which was conveniently located on the water. He hopped out onto the rocks and told us to take the skiff ourselves and fish near some rocks a bit further down the bay. We did as instructed, but he was gone for over an hour. When he returned, he said, “This place sucks, let’s go back to La Paz,” so we trailed the boat again and headed back.

Once back in La Paz, the guide took us out for another two minutes to some rather standard fishing spots, where we blind cast near mangroves and docks. Unfortunately, we didn’t see a single fish all day. The guide was clearly distracted, preoccupied with personal issues—he mentioned going through a divorce, which seemed to weigh heavily on him throughout the trip.

In the end, he asked for the full $900, which was far from the half-price rate we had discussed earlier. We felt uneasy but gave him the cash anyway, understanding that he was likely struggling financially. The entire situation felt off, especially when we ended up at his house in a quiet backstreet neighborhood, with his brother sitting on the steps. It was one of the strangest trips we’ve ever experienced.

On the bright side, the casting deck we purchased was great—about a third of the price of a new one—so at least we came away with that. In hindsight, though, we wondered if this guide might not have been the actual guide at all. He had a twin brother, and it made us think that maybe the real guide let his brother take the trip to help him out during a difficult time. There were certainly enough odd moments, especially when he offered us to get high during the trip.

Despite everything, we did manage to get something positive out of the day. But for those looking for a proper fishing experience, I’d recommend doing a little more research ahead of time—especially if you’re after something as exciting as catching dorado. Check out this guide on how to catch a dorado for a more rewarding and focused adventure.

My Eight-Day Journey Through Peru

Ollantaytambo alpaca in peru ventana travel

Last year, while on a company retreat, I embarked on an unforgettable eight-day personal journey through Peru, traveling from the bustling city of Lima to the ancient ruins of Machu Picchu. This trip was more than just a vacation; it was a deep dive into a world rich with history, vibrant culture, and, of course, incredible food.

Day 1: Arrival in Lima

The plane touched down in Lima late at night. The city’s energy was palpable even in the darkness, but I was too tired to explore. A quick Uber ride to my hotel in Miraflores was all I could manage before collapsing into bed, excited for the adventures to come.

Day 2: Exploring Lima’s Treasures

The morning light revealed Lima’s unique charm. I started my day at the Museo Larco, a museum nestled in a beautifully restored 18th-century mansion. The museum’s pre-Columbian art collection was stunning—intricate pottery, textiles, and gold and silver artifacts that hinted at the rich cultures that existed long before the Inca Empire.

After the museum, I joined a city tour, wandering through the historic center. The Plaza Mayor was a highlight, with its colonial architecture and the grand Government Palace. For lunch, I couldn’t resist the lure of Central, one of Lima’s top restaurants. Their tasting menu was an experience in itself, with dishes representing the diverse ecosystems of Peru.

Day 3: Cusco Bound

An early morning flight whisked me away to Cusco, the heart of the Inca Empire. I arrived just in time to join an afternoon tour of the city’s Inca ruins. Sacsayhuamán was particularly impressive—massive stones fitted together with such precision that not even a blade of grass could slip between them. That evening, I indulged in a hearty meal at Cicciolina, a charming restaurant near the main square, before retiring for the night.

Day 4: Sacred Valley Wonders

The Sacred Valley was on the agenda today, and it did not disappoint. Ollantaytambo, with its impressive terraces and towering stone structures, felt like stepping back in time. The town itself was a picturesque maze of cobblestone streets and ancient water channels. After a full day of exploration, I spent the night in Ollantaytambo, enjoying a quiet dinner at El Albergue.

Day 5: Journey to Machu Picchu Pueblo

The next morning, I boarded a train bound for Machu Picchu Pueblo. The ride through the lush valley was breathtaking, and by the time I arrived, I was more than ready to explore. The town, nestled in the mountains, had a relaxed vibe. I wandered the streets, stopping at Indio Feliz Bistro for a late lunch. The food was a delightful fusion of Peruvian and French cuisine, and the cozy atmosphere made it feel like a hidden gem.

Day 6: The Majestic Machu Picchu

The day I had been waiting for: a tour of Machu Picchu. Arriving early was key to beating the crowds. As I walked through the ancient city, the early morning mist lifted, revealing the iconic views. The experience was surreal, and the sense of history was overwhelming. After a few hours, I caught the train back to Ollantaytambo, followed by a bus ride to Cusco. I spent the evening dining at Chicha, one of Gastón Acurio’s restaurants, where the menu showcased modern takes on traditional Peruvian dishes.

Day 7: A Final Day in Cusco

With some time to spare before my evening flight back to Lima, I spent the morning wandering the streets of Cusco. The San Pedro Market was a sensory overload, with vibrant colors and the smells of fresh produce and street food filling the air. I grabbed a light lunch at Greens Organic, enjoying a fresh quinoa salad that was both healthy and delicious.

Day 8: Lima’s Last Hurrah

My final day in Peru began with a tour of Huaca Pucllana, an ancient pyramid nestled in the heart of Miraflores. The juxtaposition of the ruins against the modern city skyline was fascinating. For lunch, I couldn’t resist a final Peruvian feast at La Mar Cebichería. Their ceviche was the perfect way to end my culinary journey.

With a few hours left before my flight, I explored the nearby Kennedy Park and did some last-minute shopping. As I boarded the plane that night, I reflected on the incredible experiences I’d had—the warmth of the people, the depth of the culture, and the sheer beauty of Peru.

Practical Tips:

  • Transportation: Uber was a lifesaver, especially in Lima. It’s safe, cheap, and reliable. Just make sure to download the app before you arrive.

  • Currency: Peruvian soles are the way to go. Bring small bills, and consider exchanging money at street vendors for better rates.

  • Safety: I felt safe throughout my trip, even when walking alone at night in Cusco and Lima.

  • Altitude: If you’re not used to high altitudes, take it easy in Cusco and drink plenty of water. I found herbal supplements and ibuprofen helpful.

  • Essentials: Carry tissues and small bills, especially for bathroom stops and tipping. And don’t forget the sunscreen and bug spray!

Peru exceeded all my expectations. From the bustling streets of Lima to the serene heights of Machu Picchu, it was a journey I’ll never forget.

Kiteboarding Lessons in La Ventana

kiteboarding lessons la ventana bcs mexico

A kiteboarding vacation in La Ventana can be a thrilling and memorable experience. Here’s a detailed breakdown of what we can offer:

6-Night Stay & Accommodations

La Ventana offers a range of accommodation options, from cozy bungalows to more luxurious resorts. If you’re looking for a convenient and comfortable stay, consider staying at a kiteboarding resort that offers direct access to the beach and kiteboarding facilities.

Kiteboarding Lessons with Simone

Simone is known to be a skilled and patient kiteboarding instructor. Typically, lessons will be tailored to your skill level, whether you’re a beginner or looking to refine your techniques. A typical package may include daily lessons, equipment rental, and safety gear. The lessons usually progress from ground training to water starts and, eventually, riding.

Meals at On-Site Restaurant

Many kiteboarding resorts in La Ventana have on-site restaurants that offer breakfast and lunch. Expect a mix of local and international cuisine, with fresh seafood, Mexican dishes, and healthy options. Breakfast might include options like fresh fruit, eggs, and Mexican staples like chilaquiles, while lunch could range from tacos and salads to heartier dishes.

Wind Conditions in January

January is an excellent time for kiteboarding in La Ventana, as it falls within the windy season. The winds are typically consistent, ranging from 15 to 25 knots, making it ideal for both beginners and experienced kiteboarders. The wind usually picks up around late morning and can last throughout the afternoon.

Evening Activities in La Ventana

In the evenings, La Ventana offers a laid-back vibe with several options for dining and relaxation:

  • Local Restaurants and Bars: Enjoy fresh seafood, tacos, and other Mexican delicacies at local eateries. Some popular spots include Restaurant Coya and Baja Joe’s.
  • Live Music and Events: Some local bars and restaurants occasionally host live music or events. Check out places like Marlin Azul for a more lively atmosphere.
  • Relaxation: If you prefer a quieter evening, you can enjoy a peaceful sunset by the beach or take a stroll along the shore.

For a comprehensive package, contact us today!

Wine Tasting in Provence at Brad and Angelina’s Estate

wine tasting in provence france brad angelina estate

I was on holiday with some family in the picturesque region of Provence, where rolling vineyards stretch as far as the eye can see, and the air is perfumed with the scent of lavender and fresh herbs. The weather was perfect—a warm, sunny day with a gentle breeze carrying the essence of the surrounding countryside. It was the kind of day that begged for a leisurely exploration of the local wines, which I was just starting to appreciate.

Eager to immerse myself in the experience, I mentioned to my cousin that I wanted to visit a vineyard. She remembered that a friend of hers had parents who owned a stunning estate nearby, complete with its own winery. The way she described the place—a grand, beautiful house set amidst vast vineyards—filled me with excitement as she dialed some numbers, hoping to arrange a visit.

Her friend was unreachable, but she managed to get in touch with the winery. The person on the line explained that the estate had recently changed ownership and needed to check with the new proprietors before allowing us to visit. After a suspenseful wait, we received a callback. The caller requested our names, vehicle registration, and emphasized that we were to drive directly to the winery once inside the estate, with strict instructions not to stop anywhere else.

As we approached the gates of Chateau Miraval, the scene was unexpectedly chaotic. Paparazzi were swarming around, their cameras clicking furiously. For a brief moment, they surrounded our car, hoping for a glimpse of celebrity. However, they quickly realized we were just an ordinary family out for a wine tasting and lost interest.

Once inside the estate, we were greeted by the sight of an exquisite landscape: the vineyards stretched out in perfectly manicured rows, with lush greenery and blooming flowers adding vibrant splashes of color. The air was warm, with the sun casting a golden hue over the fields and illuminating the stone walls of the chateau, giving it an almost magical quality.

Our guide welcomed us warmly and led us through the winery, explaining the winemaking process with passion and expertise. The tasting room was a charming, rustic space, with wooden beams overhead and large windows offering breathtaking views of the vineyards. We sampled a variety of wines, each more delightful than the last. The rosé was crisp and refreshing, with notes of strawberry and citrus that danced on the palate, perfectly capturing the essence of a summer day in Provence. The white wine had a delicate floral aroma, with hints of peach and honeysuckle, while the red was rich and robust, with deep flavors of blackberry, plum, and a subtle hint of spice.

As we savored each sip, the atmosphere was relaxed and joyful. My family and I chatted animatedly, sharing our thoughts on the wines and marveling at the beauty of our surroundings. The estate was undeniably captivating, and I understood why Brad and Angelina had chosen to buy it. The combination of the exquisite scenery, the exceptional wines, and the company of my loved ones made for an unforgettable experience.

As we departed, the sun was beginning to set, casting a warm glow over the vineyards and the chateau. The paparazzi had mostly dispersed, leaving the estate in a peaceful silence. The day had been filled with new discoveries, wonderful flavors, and the kind of memories that linger long after the wine glasses are empty.

Keto Friendly Menu on a Yoga Liveaboard

keto eggs avocado liveaboard ventana travel

Keto-Friendly Menu for a Yoga Liveaboard on a 52-Foot Luxury Catamaran in the Sea of Cortez, Baja

Breakfast Options:

  1. Avocado and Smoked Salmon Omelet
    • Filled with smoked salmon, avocado, spinach, and cream cheese, topped with fresh herbs.
  2. Greek Yogurt Parfait
    • Full-fat Greek yogurt with a mix of chia seeds, crushed nuts, and fresh berries.
  3. Keto Pancakes
    • Made with almond flour, served with butter and a sugar-free berry compote.
  4. Egg Muffins
    • Mini frittatas with bell peppers, onions, cheese, and bacon or sausage.

Lunch Options:

  1. Grilled Chicken Caesar Salad
    • Romaine lettuce, grilled chicken breast, parmesan cheese, and keto-friendly Caesar dressing.
  2. Zucchini Noodles with Pesto and Grilled Shrimp
    • Zoodles tossed in homemade basil pesto, topped with grilled shrimp and cherry tomatoes.
  3. Stuffed Avocados
    • Avocado halves filled with a mixture of tuna salad, celery, red onion, and a dash of lemon juice.
  4. Cobb Salad
    • Mixed greens, bacon, hard-boiled eggs, avocado, blue cheese, grilled chicken, and a low-carb dressing.

Dinner Options:

  1. Seared Ahi Tuna Steaks
    • Served with a side of sautéed asparagus and a sesame-soy dipping sauce.
  2. Herb-Crusted Rack of Lamb
    • Accompanied by roasted Brussels sprouts and cauliflower mash.
  3. Grilled Ribeye with Garlic Butter
    • Paired with a fresh side salad and creamy garlic mushrooms.
  4. Baked Lemon Garlic Cod
    • With a side of zucchini gratin and a green bean almondine.

Snack Options:

  1. Cheese and Charcuterie Board
    • A selection of cheeses, olives, cured meats, nuts, and keto-friendly crackers.
  2. Guacamole and Veggie Sticks
    • Fresh guacamole served with cucumber, bell pepper, and celery sticks.
  3. Keto Fat Bombs
    • Made with coconut oil, almond butter, and dark chocolate.
  4. Deviled Eggs
    • Classic deviled eggs with a touch of paprika and chives.

Dessert Options:

  1. Keto Chocolate Mousse
    • A rich and creamy mousse made with dark chocolate and whipped cream.
  2. Berries with Whipped Cream
    • A simple and refreshing dessert with fresh berries and a dollop of whipped cream.
  3. Keto Cheesecake Bites
    • Mini cheesecakes made with a nut crust and topped with a berry compote.

Beverage Options:

  1. Herbal Teas and Infused Water
  2. Bulletproof Coffee
  3. Sparkling Water with Lime or Lemon
  4. Keto-Friendly Smoothies
    • Made with avocado, spinach, almond milk, and a choice of low-carb fruits like berries.

This menu focuses on fresh, local ingredients, highlighting the flavors of Baja while ensuring that each meal is both delicious and keto-friendly. The gourmet chef can also personalize dishes based on specific dietary preferences or requirements.

Perfect Flyfishing Trip in Magdalena Bay

mag bay flyfishing tour

Location Overview: Magdalena Bay, located on the Pacific coast of the Baja California Peninsula in Mexico, is renowned for its rich marine biodiversity and stunning landscapes. It’s an ideal destination for fly fishing enthusiasts.

Fish Species

Inshore Species:

  • Spotted Bay Bass
  • Corvina
  • Snook
  • Halibut

Offshore Species:

  • Roosterfish
  • Dorado (Mahi Mahi)
  • Yellowtail
  • Jack Crevalle

Gear Recommendations

Rod and Reel:

  • Rods: 8-9 weight rods for inshore species; 10-12 weight rods for offshore species.
  • Reels: Saltwater reels with a strong drag system, capable of holding plenty of backing.

Lines:

  • Inshore: Floating and intermediate lines.
  • Offshore: Intermediate and sinking lines.

Leaders and Tippets:

  • Leaders: 9-12 feet, tapered.
  • Tippets: 16-20 lb for inshore, 30-40 lb for offshore.

Flies:

  • Inshore: Clouser Minnows, Deceivers, Shrimp and Crab patterns.
  • Offshore: Poppers, large streamers, and baitfish imitations.

Local Conditions

Weather:

  • Best Time to Visit: October to April, when the weather is milder and the fish are more active.
  • Temperature: Daytime temperatures range from 70-85°F (21-29°C).
  • Wind: Expect some wind, particularly in the afternoons.

Tides and Water Conditions:

  • Tides: Check local tide charts for the best fishing times; fish are more active during tide changes.
  • Water Clarity: Generally clear, though can vary with weather conditions.

Trip Itinerary

Day 1: Arrival and Setup

  • Arrive at Magdalena Bay and check into your accommodation (consider a local lodge or Airbnb near the water).
  • Set up your gear and get acquainted with the local guides.

Day 2-3: Inshore Fishing

  • Start early to take advantage of the calm morning conditions.
  • Target inshore species like Spotted Bay Bass, Corvina, and Snook.
  • Focus on estuaries and mangrove channels.
  • Use light tackle and small, realistic fly patterns.

Day 4-5: Offshore Fishing

  • Head offshore with a local guide.
  • Target species like Roosterfish, Dorado, and Yellowtail.
  • Use larger, more durable flies and heavier tackle.
  • Fish near reefs and drop-offs where these species are more likely to be found.

Day 6: Rest and Explore

  • Take a break from fishing to explore the local area.
  • Visit the nearby town of Puerto San Carlos for local cuisine and culture.
  • Consider a whale-watching tour if visiting during the gray whale season (December to April).

Day 7: Departure

  • Pack up your gear and head back home, reminiscing about the incredible fishing experiences and planning your next trip to Magdalena Bay.

Additional Tips

  • Local Guides: Hiring a local guide is highly recommended. They know the best spots and techniques for the area.
  • Permits: Ensure you have the necessary fishing permits for the area.
  • Conservation: Practice catch and release to help preserve the local fish populations.

Enjoy your fly fishing adventure in Magdalena Bay!

Perfect Day on a Scuba Boat in the Sea of Cortez

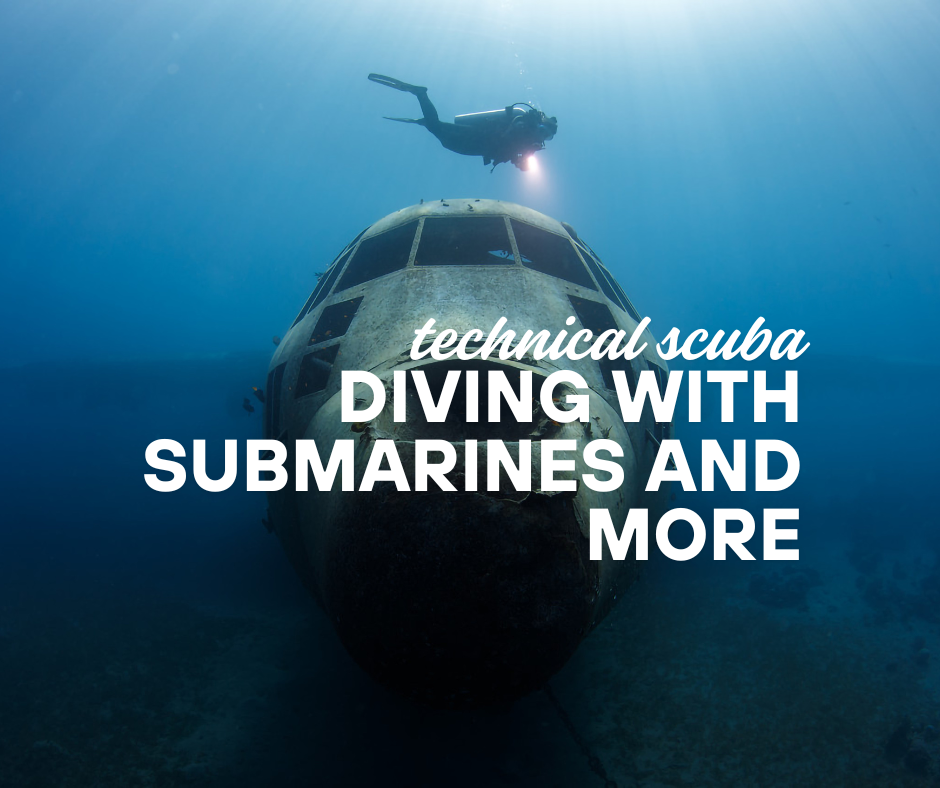
scuba shipwreck sea of cortez ventana travel

Taking place in August, here is a perfect Day scuba diving in the Sea of Cortez…

Morning: Departure and First Dive

  • 6:00 AM – Departure from the Dock
    • Arrive at the dock and board the scuba boat.
    • Enjoy a light breakfast with fresh fruit, pastries, coffee, and juice on board.
  • 7:00 AM – Briefing and Gear Setup
    • Safety briefing and dive plan overview by the dive master.
    • Setup and check scuba gear.
  • 8:00 AM – First Dive: El Bajo Seamount
    • Dive site known for its deep canyons and marine life, including hammerhead sharks.
    • Dive depth: 80-100 feet.
    • Dive duration: 45-60 minutes.
  • 9:30 AM – Surface Interval
    • Snacks and hydration on the boat.
    • Relax and enjoy the view, spotting dolphins or sea birds.

Late Morning: Second Dive and Relaxation

  • 10:30 AM – Second Dive: Los Islotes
    • Famous for its playful sea lion colony.
    • Dive depth: 30-70 feet.
    • Dive duration: 45-60 minutes.
  • 12:00 PM – Surface Interval and Lunch
    • Return to the boat for a delicious lunch with sandwiches, salads, and cold drinks.
    • Time for snorkeling or a refreshing swim near the boat.

Afternoon: Third Dive and Leisure

  • 1:30 PM – Third Dive: Fang Ming Wreck
    • Explore the artificial reef created by this sunken Chinese vessel.
    • Dive depth: 60-80 feet.
    • Dive duration: 45-60 minutes.
  • 3:00 PM – Surface Interval and Sightseeing
    • Snacks and drinks on the boat.
    • Cruise to a scenic spot for a leisurely break.
    • Opportunity to spot whale sharks or manta rays.

Late Afternoon: Fourth Dive and Sunset Cruise

  • 4:00 PM – Fourth Dive: La Reina
    • Known for beautiful coral formations and diverse fish species.
    • Dive depth: 40-60 feet.
    • Dive duration: 45-60 minutes.
  • 5:30 PM – Surface Interval and Snacks
    • Enjoy a light snack and refreshments.
    • Prepare for the return journey.

Evening: Return and Celebration

  • 6:00 PM – Sunset Cruise Back to the Dock
    • Relax on the deck, soaking in the stunning sunset views over the Sea of Cortez.
    • Reflect on the day’s adventures with fellow divers.
  • 7:00 PM – Return to the Dock
    • Arrive back at the dock.
    • Offload gear and say goodbye to the crew.
  • 7:30 PM – Dinner and Drinks
    • Optional: Head to a local restaurant for a celebratory dinner with fresh seafood and Mexican dishes.
    • Share dive stories and enjoy the vibrant evening atmosphere.

Additional Tips

  • Hydration and Sun Protection
    • Bring plenty of water, sunscreen, and a hat for protection from the sun.
  • Dive Certification
    • Ensure all divers have the appropriate certification for the dive sites.
  • Marine Life Awareness
    • Follow guidelines to protect marine life and coral reefs.
  • Camera Equipment
    • Bring underwater cameras to capture the stunning marine biodiversity.

This itinerary offers a well-rounded scuba diving experience in the Sea of Cortez, combining thrilling dives with relaxation and the beauty of the surrounding marine environment.

Sea of Cortez Spearfishing Liveaboard Itinerary

catamaran in the sea of cortez ventana travel

Our spearfishing liveaboard adventure in the Sea of Cortez offers an exciting blend of marine exploration, relaxation, and underwater hunting. Here’s a sample detailed week-long itinerary to make the most of your trip:

Day 1: Arrival and Departure

Morning

  • Arrival in La Paz: Fly into La Paz, the capital of Baja California Sur. Alaska is now running flights here from Los Angeles.
  • Transfer to lodging: Take our pre-arranged shuttle to our resort partner. We will board the boat the following day. We will go over your itinerary at the welcome dinner.

Afternoon

  • Board the Liveaboard Catamaran: Check-in, meet the crew, and settle into your cabin.
  • Safety Briefing: Attend a safety briefing and get an introduction to the boat and equipment.

Evening

  • Departure: Set sail from La Paz, heading towards the first spearfishing spot.
  • Welcome Dinner: Enjoy a welcome dinner on board, getting to know fellow travelers.

Day 2: Espiritu Santo Island

Morning

  • Breakfast on Board: Start your day with a hearty breakfast.
  • Spearfishing Session: Head out for the first spearfishing session around Espiritu Santo Island, known for its clear waters and abundant marine life.

Afternoon

  • Lunch: Return to the boat for lunch and share the morning’s experiences.
  • Explore Coves: Visit nearby coves and beaches, possibly spotting sea lions and tropical fish.

Evening

  • Dinner: Enjoy a freshly prepared dinner by our onboard chef.
  • Stargazing: Relax on deck and enjoy the clear night sky.

Day 3: Isla Partida

Morning

  • Spearfishing Session: After breakfast, dive at Isla Partida, known for its rocky reefs and pelagic species.

Afternoon

  • Lunch: Enjoy a delicious lunch on board.
  • Relaxation: Take a break, sunbathe, or snorkel in the calm waters.

Evening

  • Night Dive (Optional): For the adventurous, a night spearfishing dive can be arranged.
  • Dinner: Dinner on board, sharing stories of the day’s catches.

Day 4: San Francisco Island

Morning

  • Spearfishing Session: Spearfish around San Francisco Island, famous for its dramatic landscapes and underwater biodiversity.

Afternoon

  • Lunch: Relish a lunch break on board.
  • Beach Time: Spend some time on the picturesque beaches, swimming or kayaking.

Evening

  • Dinner: Enjoy a communal dinner with fresh seafood.
  • Marine Life Presentation: Attend an informative session about the local marine life.

Day 5: San Jose Island

Morning

  • Spearfishing Session: Explore the waters around San Jose Island, targeting larger game fish.

Afternoon

  • Lunch: Refuel with a hearty lunch.
  • Hike: If conditions allow, take a guided hike on the island to explore its unique flora and fauna.

Evening

  • Barbecue Night: Have a beach barbecue dinner with the day’s catch.
  • Bonfire: Enjoy a bonfire on the beach, sharing stories and relaxing.

Day 6: Santa Catalina Island

Morning

  • Spearfishing Session: Dive in the waters around Santa Catalina Island, known for its crystal-clear visibility.

Afternoon

  • Lunch: Savor a well-deserved lunch on board.
  • Relaxation: Spend the afternoon snorkeling, paddle boarding, or simply lounging on the boat.

Evening

  • Dinner: Enjoy a gourmet dinner.
  • Movie Night: Watch a marine-themed movie or documentary on board.

Day 7: Return to La Paz

Morning

  • Final Spearfishing Session: Have one last spearfishing session in a prime spot near La Paz.
  • Breakfast: Return to the boat for a farewell breakfast.

Afternoon

  • Cruise Back to La Paz: Begin the journey back to La Paz.
  • Lunch: Enjoy a leisurely lunch while cruising.

Evening

  • Disembark: Arrive in La Paz in the late afternoon, disembark, and transfer to our hotel partner for your final night. You will board your flight flight the following morning.

Tips and Recommendations

  • Gear: Ensure you have all necessary spearfishing gear, including wetsuits, fins, masks, and spearguns. Most liveaboards provide rental options.
  • Permits: Verify that all necessary fishing permits are obtained.
  • Safety: Always dive with a buddy and follow the crew’s safety instructions.
  • Respect Marine Life: Practice sustainable and ethical spearfishing. Only take what you need and follow local regulations.

This itinerary balances spearfishing sessions with relaxation and exploration, offering a comprehensive and enjoyable experience in the Sea of Cortez.

Group Wine Excursions in Baja

wine tasting pairing in southern baja ventana travel

One of our favorite trips to host are our group wine trips in our headquarters in Southern Baja. We tie in a multitude of desert and water activities and end each evening with chef curated meals and wine pairings.

Southern Baja California offers several notable vineyards that are worth that we include in our trips for their unique experiences and exquisite wines. Here are some highlights:

  1. Las Tinajas: Located near Todos Santos, Las Tinajas is the first commercial winery in the Los Cabos area. It offers a variety of wines, including Syrah, Chardonnay, and Cabernet Sauvignon, among others. The winery is known for its picturesque setting and plans to offer tours soon​
  2. Finca la Carrodilla: This vineyard in Valle de Guadalupe, northern Baja California, uses certified organic grapes. It’s known for its relaxed atmosphere and self-guided tastings in a beautiful rooftop garden​ 
  3. Decantos Vinícola: Situated in Valle de Guadalupe, this winery uses gravity instead of mechanical methods to decant wine, preserving its flavor and aroma. The winery is noted for its modern architecture and scenic views​ 
  4. Casa Magoni: Also in Valle de Guadalupe, Casa Magoni blends Italian winemaking traditions with Baja’s terroir. It features a modern tasting room and a variety of experimental grape varietals​
  5. Adobe Guadalupe: This vineyard offers a full winery experience with premium wines, luxurious accommodations, and warm hospitality. It’s an excellent choice for a more immersive visit​ 

These vineyards provide a range of experiences from innovative winemaking techniques to sustainable practices, making them a great addition to any visit to southern Baja California.

Where to Swim with Sea Turtles

swimming with sea turtles ventana travel

Swimming with sea turtles is a popular activity in various beautiful locations around the world. Here are some top spots where you can enjoy this experience:

  1. Hanauma Bay, Hawaii: This marine embayment formed within a tuff ring is a popular spot for snorkeling and seeing green sea turtles.
  2. Akumal, Mexico: Located in the Riviera Maya, Akumal means “Place of the Turtles” in the Mayan language and is famous for its resident sea turtles.
  3. Great Barrier Reef, Australia: One of the most renowned snorkeling and diving locations, the Great Barrier Reef offers numerous spots where you can swim with sea turtles.
  4. Galápagos Islands, Ecuador: The islands are a haven for diverse wildlife, including the famous Galápagos giant tortoises and sea turtles.
  5. Barbados: Carlisle Bay is a great place to snorkel with sea turtles, often Hawksbill and Leatherback turtles.
  6. Maui, Hawaii: Turtle Town and Maluaka Beach are popular locations to see Hawaiian green sea turtles.
  7. Fernando de Noronha, Brazil: This volcanic archipelago offers clear waters and a good chance of swimming with sea turtles.
  8. Bay Islands, Honduras: Utila and Roatan are part of the Mesoamerican Barrier Reef and are great for spotting sea turtles.

Remember to always respect wildlife and follow guidelines to ensure the safety and preservation of these beautiful creatures.

How to Rig a Sailboat

rigging a sailing catamaran

Rigging a sailboat involves setting up the sails and the associated lines, cables, and hardware to prepare the boat for sailing. Here’s a step-by-step guide to help you rig a typical sailboat:

Step-by-Step Guide to Rigging a Sailboat

1. Preparation

  • Safety First: Wear a life jacket and ensure all safety equipment is onboard.
  • Check the Weather: Ensure conditions are suitable for sailing.
  • Inspect the Boat: Check the hull, rigging, sails, and all equipment for any signs of damage or wear.

2. Assemble the Mast

  • Step the Mast: If the mast is not already stepped (standing), position it upright and secure it in the mast step.
  • Attach the Shrouds and Stays: Connect the side shrouds (wires running from the top of the mast to the sides of the boat) and the forestay (wire running from the top of the mast to the bow) and backstay (from the top of the mast to the stern). Ensure they are properly tensioned.

3. Prepare the Boom

  • Attach the Boom: Secure the boom to the mast using the gooseneck fitting.
  • Attach the Topping Lift: Connect the topping lift to the end of the boom to hold it up when the sail is down.

4. Set Up the Main Sail

  • Unfold the Main Sail: Lay out the main sail on the deck and untangle any lines.
  • Attach the Sail to the Boom: Secure the foot of the main sail to the boom using the sail slides or slugs and clew outhaul.
  • Attach the Sail to the Mast: Slide the sail slides or slugs into the mast track.
  • Raise the Main Sail: Using the main halyard, pull the main sail up the mast. Secure the halyard to a cleat once the sail is fully raised.

5. Set Up the Jib or Genoa

  • Attach the Jib/Genoa: Connect the head of the jib or genoa to the halyard and the tack to the deck fitting at the bow.
  • Attach the Sheets: Run the jib sheets (lines) through the fairleads and back to the cockpit winches.
  • Raise the Jib/Genoa: Pull the jib/genoa up using the halyard and secure the halyard to a cleat.

6. Running Rigging

  • Check All Lines: Ensure all running rigging (halyards, sheets, control lines) are properly run and free of tangles.
  • Adjust the Sails: Use the main sheet to control the main sail and the jib sheets to control the jib/genoa.

7. Final Checks

  • Tension the Standing Rigging: Ensure all shrouds and stays are properly tensioned to support the mast.
  • Test the Sails: Slowly let out the sails to ensure they catch the wind properly and can be trimmed (adjusted) as needed.
  • Safety Check: Ensure all lines are secured, and there are no loose items on deck.

Additional Tips

  • Practice: Rigging a sailboat efficiently comes with practice. Familiarize yourself with your boat’s specific setup.
  • Seek Help: If you’re new to sailing, consider asking an experienced sailor to help you the first few times.
  • Consult the Manual: Always refer to your sailboat’s manual for specific instructions and diagrams.

By following these steps, you’ll have your sailboat rigged and ready to enjoy a day out on the water. Happy sailing!

The Benefits of “Glamping”

glamping with ventana travel

Glamping, or glamorous camping, combines the experience of being close to nature with the comfort and luxury of modern amenities. Here are some of the best aspects of glamping:

  1. Comfort and Luxury: Unlike traditional camping, glamping often includes comfortable beds, electricity, private bathrooms, and sometimes even air conditioning and heating. This makes the experience more enjoyable, especially for those who prefer not to rough it.
  2. Unique Accommodations: Glamping accommodations can be quite unique and varied, including yurts, treehouses, safari tents, airstreams, domes, and cabins. These unique setups add an element of adventure and novelty to the experience.
  3. Access to Nature: Glamping allows you to stay in beautiful, remote locations without sacrificing comfort. You can enjoy stunning natural scenery, whether it’s a forest, mountain, desert, or beach setting.
  4. Convenience: Glamping takes the hassle out of camping. There’s no need to set up tents, start a fire, or cook over a camp stove unless you want to. Many glamping sites provide meals or have facilities for easy cooking and dining.
  5. Amenities: Many glamping sites offer additional amenities such as hot tubs, spa services, guided tours, and outdoor activities like hiking, fishing, or kayaking. This enhances the overall experience and provides a mix of relaxation and adventure.
  6. Great for Groups: Glamping can be an excellent option for group outings, family vacations, or romantic getaways. The comfortable accommodations and added amenities make it accessible and enjoyable for people of all ages and preferences.
  7. Eco-Friendly Options: Many glamping sites emphasize sustainability and eco-friendly practices, such as using solar power, composting toilets, and locally sourced materials. This allows you to enjoy nature responsibly.
  8. Less Gear to Pack: Since many glamping sites provide the essentials (and more), you don’t need to pack as much gear as you would for traditional camping. This makes travel easier and more convenient.

Overall, glamping offers a way to experience the great outdoors without giving up the comforts and conveniences of modern life, making it an attractive option for a wide range of travelers.

What it’s Like in Magdalena Bay

mag bay gray whale trip

Gray Whales

Magdalena Bay is one of the primary breeding and calving grounds for gray whales during their annual migration. Each year, from December to April, gray whales migrate from the cold waters of the Arctic to the warm, protected waters of Baja California, including Magdalena Bay, to give birth and nurture their young.

Find out more about our Mag Bay trips…


Underwater Photography

Magdalena Bay offers excellent opportunities for underwater photography. The bay’s rich marine biodiversity and clear waters make it a great destination for capturing stunning underwater images. Here are some highlights for underwater photographers:

  • Marine Life: The bay is home to a wide variety of marine life, including fish, rays, sea turtles, and various invertebrates. During the gray whale season, you might even capture close encounters with these magnificent creatures.
  • Mangroves and Seagrass Beds: The bay’s mangroves and seagrass beds provide unique underwater landscapes and habitats for numerous marine species, offering diverse photographic subjects.
  • Clear Waters: The water clarity in Magdalena Bay is often good, especially in the protected areas, making it easier to capture sharp and vibrant underwater images.
  • Colorful Corals: Although not as abundant as in some tropical destinations, there are still patches of colorful corals and sponges that provide interesting subjects and backgrounds for underwater photography.
  • Diverse Ecosystems: The variety of ecosystems within the bay, from shallow lagoons to deeper channels, allows for a range of photographic opportunities and creative compositions.

How about bird watching? 

Here are some highlights for bird watchers:

  • Migratory Birds: Magdalena Bay is a stopover for many migratory bird species traveling along the Pacific Flyway. During migration seasons, you can observe a variety of shorebirds, waders, and waterfowl.
  • Resident Birds: The bay is home to numerous resident bird species. You can spot species such as herons, egrets, pelicans, cormorants, and frigatebirds throughout the year.
  • Mangrove Habitats: The extensive mangrove forests around the bay are particularly rich in birdlife. These areas provide nesting and feeding grounds for many species, including the mangrove warbler and the yellow-crowned night heron.
  • Bird Islands: Several islands within the bay are important breeding sites for seabirds. Visiting these islands can offer sightings of nesting birds and their chicks.
  • Raptors: Birds of prey, such as ospreys and hawks, can be seen hunting over the bay and its surrounding areas.
  • Waterfowl and Shorebirds: The shallow waters and mudflats of Magdalena Bay attract a variety of waterfowl and shorebirds, including sandpipers, plovers, and ducks.

So How do I get there? 

Getting to Magdalena Bay involves a few steps, as it is a relatively remote location in Baja California Sur, Mexico. Here is a general guide on how to get there:

Fly to La Paz or Loreto:

    • La Paz: La Paz International Airport (Manuel Márquez de León International Airport, code: LAP) is a common entry point. La Paz is about 4-5 hours by road from Magdalena Bay. We offer shuttle service from here.
    • Cabo: Cabo International Airport (code: SJD) is another option. We offer shuttle service from here.
    • From La Paz:
      • Shuttle or Private Transfer: Arrange for a shuttle service or private transfer from La Paz to Magdalena Bay. We have a shuttle service from here.

Local Transport:

  • Boat Tours: Once in San Carlos or Puerto López Mateos, our local boat operators are ready for tours around Magdalena Bay. These tours can include whale watching, bird watching, and exploring the mangroves and other natural attractions.

Do Skydiving Themed Group Trips Exist?

ventana travel group skydiving trips

Yes, there are group trips and tours specifically centered around skydiving experiences. These trips are often organized by adventure travel companies or specialized skydiving centers. Here are some common types of group skydiving trips:

  1. Tandem Skydiving Groups: Tandem skydiving involves jumping while harnessed to an experienced instructor. Many skydiving centers offer group discounts for tandem jumps, making it popular for groups of friends, families, or corporate team-building events.
  2. Group Training Courses: Some skydiving centers offer group training courses for those interested in becoming licensed skydivers. These courses typically involve several days of intensive training followed by group jumps.
  3. Destination Skydiving Trips: Adventure travel companies may organize skydiving trips to iconic or scenic locations around the world. These trips often combine skydiving with other activities such as sightseeing, outdoor adventures, or cultural experiences.
  4. Special Events and Festivals: Skydiving events and festivals, such as boogies or boogies, attract skydivers from around the world for days of jumping, socializing, and entertainment. These events often include group jumps, skills camps, and parties.
  5. Charity Skydiving Events: Groups may organize skydiving events as fundraisers for charity. Participants raise money for a cause and then skydive together as a group, often with the support of the skydiving community.

Whether you’re a beginner looking to experience the thrill of skydiving for the first time or an experienced skydiver seeking new adventures, there are plenty of opportunities to join group trips centered around skydiving.

Picking a Catamaran for a Family of Twelve

picking the right catamaran for your family

Choosing the right catamaran for a family of 12 involves considering several factors such as size, layout, amenities, budget, and intended use. Here are some steps to help you pick the right one:

  1. Capacity: Ensure the catamaran can comfortably accommodate 12 people. Look for spacious cabins, lounges, and deck areas.
  2. Layout: Consider the layout of the catamaran. Look for multiple cabins with enough beds for everyone, as well as communal areas like a saloon, galley, and outdoor seating areas.
  3. Amenities: Determine what amenities are important to you and your family. This could include features like multiple bathrooms, a well-equipped kitchen, entertainment systems, water sports equipment, and outdoor grilling areas.
  4. Sailing vs. Motor: Decide whether you prefer a sailing catamaran or a motorized one. Sailing catamarans offer a more traditional sailing experience and are often more environmentally friendly, while motorized catamarans provide greater speed and convenience.
  5. Brand and Reputation: Research different catamaran brands and their reputations for quality, reliability, and customer service. Popular brands include Lagoon, Leopard, Fountaine Pajot, and Sunreef Yachts.
  6. Budget: Set a budget for your catamaran purchase, including ongoing maintenance and operating costs. Keep in mind that larger catamarans with more amenities will generally come with a higher price tag.
  7. Charter vs. Purchase: Decide whether you want to purchase a catamaran outright or charter one for vacations and special occasions. Chartering can be a more cost-effective option if you don’t plan to use the catamaran regularly.
  8. Test Sail: If possible, arrange a test sail or visit boat shows to get a feel for different catamaran models and their features. This will help you make an informed decision based on your preferences and needs.

By considering these factors, you can narrow down your options and find the perfect catamaran for your family of 12. Whether you’re looking for a luxurious floating villa for long-term cruising or a spacious yacht for weekend getaways, there’s a catamaran out there that will meet your needs.

Touring the Islands of the Sea of Cortez

whales in the sea of cortez ventana travel

Touring the islands of the Sea of Cortez offers a remarkable experience of nature’s beauty and marine diversity. Here’s a suggested itinerary for a captivating island-hopping adventure:

Day 1: Arrival in La Paz

  • Morning: Arrive in La Paz, the capital city of Baja California Sur. Check into your hotel and enjoy a leisurely breakfast.
  • Afternoon: Explore La Paz’s Malecón (boardwalk), visit the Cathedral of La Paz, and wander through the city’s vibrant markets.
  • Evening: Enjoy dinner at a local seafood restaurant and rest up for the adventures ahead.

Day 2: Espíritu Santo Island

  • Morning: Embark on a boat tour to Espíritu Santo Island, a UNESCO World Heritage Site known for its stunning beaches, crystal-clear waters, and diverse marine life.
  • Afternoon: Snorkel among colorful fish and sea lions, kayak through secluded coves, and hike along scenic trails.
  • Evening: Return to La Paz, dine at a seaside restaurant, and relax.

Day 3: Isla Partida

  • Morning: Catch a ferry to Isla Partida, located just east of Espíritu Santo. Spend the day exploring its pristine beaches, hidden coves, and rugged landscapes.
  • Afternoon: Snorkel in the island’s turquoise waters, picnic on the beach, and soak up the sun.
  • Evening: Return to La Paz and enjoy dinner at a local eatery.

Day 4: San José Island

  • Morning: Depart for San José Island, renowned for its stunning white-sand beaches and rich marine biodiversity.
  • Afternoon: Explore the island’s underwater wonders through snorkeling or diving. Keep an eye out for colorful reef fish, sea turtles, and whale sharks.
  • Evening: Watch the sunset from the island’s shores before returning to La Paz for dinner.

Day 5: Cerralvo Island

  • Morning: Take a boat excursion to Cerralvo Island, also known as Jacques Cousteau Island, famous for its exceptional diving opportunities and underwater rock formations.
  • Afternoon: Dive into the clear waters to discover vibrant coral reefs, underwater caves, and an array of marine species.
  • Evening: Return to La Paz and enjoy a farewell dinner at a local restaurant, savoring the flavors of Baja cuisine.

Day 6: Departure

  • Morning: Depending on your departure time, you may have some free time to explore more of La Paz or pick up last-minute souvenirs.
  • Afternoon: Head to the airport or your next destination, bidding farewell to the enchanting islands of the Sea of Cortez.

This itinerary provides a balanced mix of adventure, relaxation, and exploration, allowing you to experience the natural wonders of the Sea of Cortez to the fullest. Be sure to check local weather conditions and tour availability when planning your trip.

How Often to Upgrade Kiteboarding Gear

ventana travel upgrade kiteboarding gear

The frequency of upgrading kiteboarding equipment can vary depending on several factors, including:

  1. Usage: If you kiteboard frequently, your equipment may experience more wear and tear, which could necessitate more frequent upgrades. Conversely, if you kiteboard occasionally, your gear may last longer before needing replacement.
  2. Technological Advances: Like many sports equipment, kiteboarding gear evolves over time with advancements in materials, design, and technology. Newer equipment may offer improved performance, durability, and safety features compared to older models.
  3. Condition of Equipment: Regular maintenance and proper care can extend the lifespan of your kiteboarding equipment. However, if your gear starts showing signs of significant wear, damage, or decreased performance despite maintenance efforts, it may be time to consider upgrading.
  4. Personal Preferences and Goals: Your personal preferences and goals as a kiteboarder can also influence when to upgrade your equipment. If you’re looking to improve your skills, upgrade to gear better suited to your level or style of riding may be beneficial.

As a general guideline, here are some recommendations for when to consider upgrading kiteboarding equipment:

  • Kites: Depending on usage and care, kiteboarding kites typically last anywhere from 2 to 5 years. If you notice significant wear, tear, or reduced performance, it may be time to replace your kite.
  • Control Bar and Lines: Control bars and lines can last several years with proper care. However, if you notice fraying, stretching, or other signs of wear, it’s essential to replace them for safety reasons.
  • Boards: Kiteboarding boards can last for several years with proper care, as they typically don’t undergo as much stress as kites or control bars. However, if you’re looking to upgrade to a board better suited to your riding style or skill level, you may consider replacing it sooner.

Ultimately, the decision to upgrade kiteboarding equipment depends on a combination of factors, including the condition of your current gear, advancements in technology, your riding goals, and personal preferences. Regularly inspecting your equipment and staying informed about new developments in kiteboarding gear can help you determine when it’s time for an upgrade.

How a Boat Engine Works

how boat engine works ventana travel

A boat engine, also known as a marine engine, operates on similar principles to other internal combustion engines but is designed specifically for marine applications. Here’s a basic explanation of how a boat engine works:

  1. Fuel and Air Mixture: Like any internal combustion engine, a boat engine requires a mixture of fuel and air for combustion. In most cases, the fuel used is gasoline or diesel. Air is drawn into the engine through an intake system.
  2. Compression: Once the air-fuel mixture is drawn into the engine’s cylinders, the piston compresses it. This compression raises the temperature and pressure of the mixture, making it more volatile and ready for combustion.
  3. Ignition: At the top of the compression stroke, a spark plug ignites the compressed air-fuel mixture. In diesel engines, compression alone is enough to ignite the fuel without the need for a spark plug.
  4. Power Stroke: The ignition of the air-fuel mixture causes a controlled explosion within the cylinder. This explosion forces the piston down, generating power. The power stroke is the phase where the engine produces mechanical energy to turn the crankshaft.
  5. Exhaust Stroke: After the power stroke, the exhaust valve opens, and the piston moves back up the cylinder, pushing the spent exhaust gases out of the cylinder through the exhaust system.
  6. Intake Stroke: As the exhaust stroke finishes, the intake valve opens again, and the piston moves back down the cylinder, drawing in a new charge of air and fuel for the next cycle.
  7. Repetition: These four strokes—intake, compression, power, and exhaust—constitute one complete cycle. The engine repeats this cycle continuously as long as it is running, generating power to propel the boat forward.

Boat engines can vary in design and complexity depending on factors such as size, type (inboard, outboard, or inboard/outboard), and fuel type. For instance, outboard motors are self-contained units mounted on the transom of the boat and typically include the engine, gearbox, and propeller, while inboard engines are often larger and housed within the hull of the boat, with a driveshaft transferring power to a separate propeller. Diesel engines are common in larger boats due to their fuel efficiency and torque, while gasoline engines are prevalent in smaller boats and recreational vessels.

Top Ranked Snorkel Masks

snorkeling with dolphins ventana travel

Here are some popular snorkel masks that were well-regarded on our trips last year:

  1. Cressi Palau Snorkel Set: This set includes a mask, snorkel, and fins, and it’s known for its comfortable fit and durability.
  2. Seaview 180° GoPro Compatible Snorkel Mask: This full-face snorkel mask gained popularity for its wide field of vision and compatibility with GoPro cameras for capturing underwater adventures.
  3. Ocean Reef Aria Full Face Snorkel Mask: Another full-face mask option, the Ocean Reef Aria is praised for its comfortable fit and innovative design to prevent fogging.
  4. Tribord Easybreath Full Face Snorkel Mask: Offering a wide field of vision and easy breathing, the Tribord Easybreath was one of the earlier full-face masks to gain widespread popularity.
  5. Mares Ergo Dry Snorkel: While not a full mask, the Mares Ergo Dry snorkel is often paired with various masks for its efficient dry-top system that prevents water from entering the snorkel.

These were some popular options in 2022, but I recommend checking current reviews and bestseller lists on e-commerce platforms like Amazon or outdoor recreation stores to see what snorkel masks are currently trending. Additionally, consider factors such as fit, comfort, and features that align with your specific needs when choosing a snorkel mask.

Deepest Scuba Dive

world record scuba dive

As of my last update in January 2022, the deepest scuba dive on record was achieved by Ahmed Gabr, an Egyptian scuba diver, in September 2014. Gabr descended to a depth of 332.35 meters (1,090 feet) in the Red Sea off the coast of Dahab, Egypt. This incredible feat took place over a period of 12 minutes, with Gabr spending around 15 hours on decompression stops during his ascent. Gabr’s dive set a new Guinness World Record for the deepest scuba dive, surpassing the previous record of 318.25 meters (1,044 feet) held by South African Nuno Gomes since 2005. It’s worth noting that such extreme depths are considered highly dangerous and require extensive training, experience, and specialized equipment.

World Record for the Deepest Freedive

world record freedive

The world record for the deepest freedive, also known as a no-limits freedive, was set by Austrian freediver Herbert Nitsch. On June 14, 2012, Nitsch reached a depth of 253.2 meters (831 feet) in the waters of the Greek island of Santorini. This incredible achievement was accomplished using a weighted sled to descend and an inflatable lift bag to ascend rapidly. Nitsch’s record-breaking dive demonstrated extraordinary skill, training, and physiological adaptation to extreme underwater conditions. However, it’s important to note that freediving records may change over time as athletes continue to push the limits of human capability in this challenging sport.

Ideal Group Size for a Fishing Trip

Fishing trip group size

The ideal group size for a fishing trip can vary depending on several factors such as the type of fishing, the size of the boat or fishing spot, the preferences of the participants, and logistical considerations. However, in general, a group size of 2 to 6 people is often considered ideal for a fishing trip.

Here are some considerations for different group sizes:

  1. Solo Fishing: Fishing alone can provide a serene and focused experience, allowing you to fully immerse yourself in the activity and nature. It’s also more flexible as you can choose your own pace and fishing spots without having to coordinate with others.
  2. Pair Fishing: Fishing with one other person can be enjoyable as it allows for companionship while still maintaining a relatively low profile. It’s easier to coordinate schedules and decisions with just one other person, and you can share the experience together.
  3. Small Group (3-4 people): This size group provides a good balance between camaraderie and space. You can still have intimate conversations and share the excitement of catching fish while also having enough room to move around comfortably on the boat or fishing spot.
  4. Medium Group (5-6 people): With a slightly larger group, you can enjoy the social aspect of fishing even more. It can be fun to have more people to share stories and experiences with, but it’s important to ensure that there’s enough space on the boat or fishing area for everyone to fish comfortably without crowding each other.
  5. Large Groups (7+ people): While fishing in larger groups can be enjoyable for some, it may become more challenging to manage logistics, find space on the boat, and ensure that everyone gets a chance to fish. Consideration should be given to the size of the boat or fishing area to accommodate everyone comfortably.

Ultimately, the ideal group size for a fishing trip depends on the preferences and dynamics of the participants. It’s essential to consider factors like the size of the fishing party, the type of fishing experience desired, and logistical constraints to ensure an enjoyable and memorable outing for everyone involved.

What’s the Best Kiteboard for Someone Over 40?

kiteboarding for over 40 year olds

The best type of kiteboard for someone over 40 years old would depend on various factors such as their skill level, physical condition, preferences, and the conditions they typically kiteboard in. However, there are a few general considerations that might apply:

  1. Size and Shape: Generally, larger and wider kiteboards provide more stability and floatation, which can be beneficial for older riders who may not have as much strength or agility as younger riders. A board with a larger surface area can help with early planing and easier riding in lighter winds.
  2. Flexibility: A kiteboard with some flex in its construction can offer a more forgiving ride, absorbing choppy conditions and reducing strain on the body during landings and maneuvers. This can be particularly beneficial for older riders who may have more sensitive joints or muscles.
  3. Ease of Use: Look for kiteboards that are designed for all-around or freeride purposes, as they tend to be more user-friendly and forgiving than high-performance or specialized boards like wakestyle or wave-specific boards. Boards with a moderate rocker (curve from tip to tail) and rounded outlines are often easier to ride and more forgiving.
  4. Construction and Materials: Consider kiteboards made from durable materials that can withstand the rigors of kiteboarding and provide longevity. Carbon or fiberglass reinforced boards can offer a good balance of strength, lightweight, and performance.
  5. Adjustability: Some kiteboards feature adjustable foot straps and stance options, allowing riders to customize their setup for comfort and performance. This can be beneficial for older riders who may have specific preferences or requirements for their riding stance.
  6. Safety Features: While not specific to age, safety features such as soft or rounded edges, grab handles, and footpad cushioning can enhance the overall riding experience and reduce the risk of injury, which may be particularly important for older riders.

Ultimately, it’s essential for older riders to find a kiteboard that suits their individual needs, preferences, and physical capabilities. Testing out different boards and seeking advice from experienced riders or instructors can help in finding the best kiteboard for someone over 40 years old.

Swimming with Striped Marlin in Magdalena Bay

striped marlin bait ball swimming

Swimming with striped marlin during bait ball season in Magdalena Bay can be an exhilarating and awe-inspiring experience. These sleek and powerful creatures are known for their speed and agility in the water, making encounters with them both thrilling and memorable. Here’s what it might be like:

  1. Excitement: The moment you spot a striped marlin in the water, your adrenaline starts pumping. Their distinctive striped appearance and long, pointed bills make them instantly recognizable, and the sight of these magnificent creatures in their natural habitat is truly breathtaking.
  2. Graceful Movement: As you swim alongside a striped marlin, you’ll be struck by their gracefulness in the water. Despite their size and power, they move with surprising agility, effortlessly gliding through the ocean currents with precision and speed.
  3. Close Encounters: Swimming in close proximity to a striped marlin allows you to appreciate the finer details of their anatomy and behavior. You might observe the way they use their elongated bills to herd schools of fish or witness their impressive hunting techniques as they dart through the water in pursuit of prey.
  4. Sense of Wonder: Being in such close proximity to such a majestic creature can evoke a profound sense of wonder and respect for the marine environment. It’s a humbling experience that reminds you of the beauty and diversity of life beneath the waves.
  5. Safety Considerations: While swimming with striped marlin can be an incredible experience, it’s important to remember that these are wild animals and should be treated with caution and respect. Keeping a safe distance and avoiding any sudden movements is crucial to ensure both your safety and the well-being of the marlin.

Overall, swimming with striped marlin offers a unique opportunity to connect with one of the ocean’s most magnificent inhabitants and create memories that will last a lifetime.

Tips for Equalizing Underwater

scuba diving with turtles and equalizing

Equalizing underwater is an important skill for scuba divers and free divers to prevent discomfort or injury caused by pressure changes in the ears and sinuses. Here’s a step-by-step guide on how to equalize your ears while underwater:

  1. Start Early: Begin equalizing your ears before you feel any discomfort. It’s easier to equalize when there’s minimal pressure difference between your ears and the water around you.
  2. Understand the Technique: The most common equalization technique for divers is called the Valsalva maneuver. This involves gently pinching your nostrils closed, closing your mouth, and gently blowing through your nose while attempting to breathe out against the closed airway. This action helps to open the Eustachian tubes, which connect your middle ear to the back of your throat, allowing air to flow in or out and equalizing the pressure.
  3. Practice on Land: Before you go diving, practice equalizing your ears on land to get a feel for the technique. You can do this by pinching your nostrils closed and gently blowing while paying attention to the sensation in your ears.
  4. Equalize Often: Equalize your ears frequently during your descent, especially in the first few meters of depth. This helps to gradually equalize the pressure and prevents discomfort.
  5. Descend Slowly: Take your time descending to allow your ears to equalize naturally. Avoid descending too quickly, as this can make equalization more difficult and increase the risk of barotrauma (pressure-related injury).
  6. Listen to Your Body: If you experience any discomfort or difficulty equalizing, ascend slightly until the discomfort subsides, then try equalizing again. Never force equalization if it’s painful, as this can lead to injury.
  7. Use Alternative Techniques: If you have difficulty equalizing using the Valsalva maneuver, you can try other techniques such as the Toynbee maneuver (swallowing while pinching your nose) or the Frenzel maneuver (closing your vocal cords and using your tongue to create pressure in the mouth).
  8. Seek Training: If you’re new to diving or struggling with equalization, consider taking a scuba diving course where you can learn proper equalization techniques and receive guidance from a certified instructor.

Remember, equalizing your ears should be done gently and consistently to avoid injury. If you experience persistent difficulty with equalization or have a history of ear problems, consult with a medical professional before diving.

Is Scuba Diving or Snorkeling More Popular?

snorkeling with ventana travel

The preference between scuba diving and snorkeling largely depends on individual interests, comfort levels in the water, and desired experiences. Here are some factors that may influence people’s preferences for one activity over the other:

Scuba Diving:

  1. Exploration of underwater environments: Scuba diving allows individuals to explore deeper underwater environments that may not be accessible through snorkeling. This can include exploring coral reefs, underwater caves, and shipwrecks.
  2. Closer encounters with marine life: Scuba divers can get up close and personal with marine life, as they have the ability to swim alongside fish, sea turtles, and other creatures in their natural habitat.
  3. Extended time underwater: With scuba diving, individuals can spend more time underwater compared to snorkeling, as they have access to a continuous air supply from their tanks.
  4. Certification and training: Scuba diving requires certification and training to ensure safety and proper use of equipment, which may appeal to those interested in learning new skills and techniques.

Snorkeling:

  1. Accessibility and simplicity: Snorkeling is generally more accessible and requires less equipment and training compared to scuba diving. It can be enjoyed by people of all ages and skill levels.
  2. Surface-level exploration: Snorkelers can explore the underwater world while staying close to the surface, which may appeal to those who are not comfortable diving deeper or wearing scuba gear.
  3. Cost-effectiveness: Snorkeling typically involves lower costs compared to scuba diving, as it does not require the purchase or rental of scuba gear and certification fees.
  4. Freedom of movement: Snorkelers have the freedom to move around more easily on the surface and can easily return to shore or the boat if needed.

Ultimately, both scuba diving and snorkeling offer unique opportunities to experience the underwater world and interact with marine life. Some people may prefer the thrill and adventure of scuba diving, while others may appreciate the simplicity and accessibility of snorkeling. It often comes down to personal preference and individual comfort levels in the water.

Where is the best wingfoiling on Earth?

best wingfoiling spots on earth

The popularity of wingfoiling is growing rapidly, and several locations around the world are considered ideal for wingfoiling. However, the “best” wingfoiling spot can be subjective and depends on various factors, including personal preferences, skill level, and the type of conditions you enjoy.

Some of the renowned wingfoiling destinations include:

  1. Maui, Hawaii, USA: Maui is often considered the birthplace of wingfoiling, and it offers a variety of conditions suitable for winging, from gentle waves to more challenging ones.
  2. Tarifa, Spain: Known for its consistent winds, Tarifa in southern Spain is popular among wind and water sports enthusiasts, including wingfoilers.
  3. La Ventana, Mexico: Located on the Baja California Peninsula, La Ventana is known for its steady winds and warm weather, making it a popular destination for wingfoilers.
  4. Garda Lake, Italy: The northern part of Lake Garda in Italy is known for its reliable thermal winds, attracting wingfoilers from around the world.
  5. Tahiti, French Polynesia: Tahiti offers stunning scenery and great conditions for wingfoiling, with clear blue water and consistent trade winds.
  6. Dakhla, Morocco: Dakhla is a desert peninsula in Morocco known for its flat water and strong winds, providing excellent conditions for wingfoiling.

It’s essential to note that the popularity and recognition of wingfoiling spots can change, and new destinations may have gained prominence since my last update. Additionally, weather conditions, wind patterns, and other factors can vary, influencing the suitability of a location for wingfoiling.

To get the most up-to-date information, check back here since we have group leaders running trips for wingfoiling communities all year!

How to curate the perfect wine tasting vacation

A good wine tasting vacation involves a combination of enjoyable wine experiences, beautiful surroundings, and the opportunity to explore the culture and cuisine of wine-producing regions. Here are some factors that contribute to a memorable wine tasting vacation:

  1. Diverse Wine Regions:
    • Choose destinations with diverse wine regions, each offering unique varietals, winemaking techniques, and terroirs. Popular wine regions include Napa Valley and Sonoma in California, Bordeaux in France, Tuscany in Italy, Mendoza in Argentina, and even Baja, Mexico wineries.
  2. Winery Variety:
    • Opt for an itinerary that includes a mix of small boutique wineries, larger established estates, and hidden gems. Each winery provides a different perspective on winemaking, and visiting a variety can enhance your appreciation for the craft.
  3. Scenic Landscapes:
    • Select regions with picturesque landscapes and vineyard views. A visually appealing setting enhances the overall experience and provides opportunities for leisurely walks, photography, and relaxation.
  4. Culinary Experiences:
    • Consider destinations that offer exceptional culinary experiences to complement wine tastings. Many wine regions boast renowned restaurants and local markets where you can savor regional dishes paired with local wines.
  5. Cultural Exploration:
    • Explore the local culture, history, and traditions of the wine region. This could include visits to historical sites, art galleries, museums, and participation in local events or festivals.
  6. Wine Education:
    • Look for opportunities to expand your wine knowledge. Some wineries offer educational tours, blending sessions, or special tastings where you can learn about grape varieties, production methods, and wine pairing.
  7. Wine Tours and Transportation:
    • Plan for convenient transportation options, such as guided wine tours, private drivers, or designated drivers, allowing you to relax and enjoy the tastings without worrying about driving.
  8. Accommodations:
    • Stay in charming accommodations such as boutique hotels, bed and breakfasts, or vineyard cottages to enhance the overall experience. Some vineyards even offer accommodations for a more immersive stay.
  9. Seasonal Considerations:
    • Take into account the season and weather conditions. Spring and fall are often popular times for wine tasting, but each season has its own charm. Be aware of peak tourist times and consider visiting during quieter periods.
  10. Wine Events and Festivals:
    • Check the local calendar for wine events and festivals. These can provide unique opportunities to taste rare wines, meet winemakers, and immerse yourself in the local wine culture.
  11. Wine Clubs and Memberships:
    • Some wineries offer wine clubs or memberships that provide access to exclusive tastings, events, and discounts. Joining a club can enhance your connection to a particular winery and region.
  12. Relaxation Time:
    • Allow for downtime during your vacation. Relaxing by the pool, exploring charming towns, or enjoying spa services can balance the wine-focused activities and make the trip more enjoyable.

Remember to drink responsibly, stay hydrated, and enjoy the journey of discovering new wines and regions during your wine tasting vacation.

How to learn wing foiling

Wing foiling is an exciting water sport that combines elements of windsurfing, kitesurfing, and stand-up paddleboarding. Here’s a basic guide to help you get started with wing foiling:

1. Take Lessons:

  • Consider taking lessons from a certified wing foiling instructor. Professional guidance can significantly accelerate your learning process and ensure that you develop good habits from the start. It’s differen’t than kiteboarding.

2. Choose the Right Equipment:

  • Wing: Start with a beginner-friendly wing that is appropriately sized for your weight and wind conditions. Larger wings provide more lift, making them suitable for beginners.
  • Foil Board: Use a stable and large foil board designed for beginners. A board with a large surface area helps with stability and ease of learning.
  • Foil: Select a foil with a moderate aspect ratio, which is more forgiving for learners. Foils with a lower aspect ratio provide more stability.
  • Leash: Wear a leash to ensure that the wing stays connected to you in case you fall.

3. Understand Wind Conditions:

  • Choose days with light to moderate winds when you’re starting out. Strong winds can make learning more challenging and potentially lead to unsafe situations.

4. Safety First:

  • Always wear a personal flotation device (PFD) for safety. Familiarize yourself with the local water conditions and potential hazards.

5. Master the Wing Handling:

  • Learn how to handle the wing on the beach before getting into the water. Practice holding the wing, steering, and power control.

6. Practice on Land:

  • Practice getting on the foil and maintaining balance on land or in shallow water before heading into deeper water. This will help you get a feel for the wing’s power and your board.

7. Practice Water Starts:

  • Begin in shallow water and practice water starts. Learn to position the wing properly, get onto the board, and start foiling.

8. Balance and Foot Placement:

  • Focus on finding the right balance on the board. Proper foot placement is crucial for stability and control.

9. Learn to Foil:

  • Once you’ve mastered the basics, work on getting up on the foil. Use gentle movements to control your height and direction.

10. Practice Maneuvers:

  • Start practicing basic maneuvers such as turning, jibing, and tacking. As you gain more confidence, you can explore more advanced techniques.

11. Continue Learning:

  • Wing foiling involves a learning curve, and improvement comes with practice. Be patient, and gradually challenge yourself as you become more comfortable on the foil.

12. Join a Community:

  • Connect with local wing foiling communities, both online and offline. You can learn valuable tips, share experiences, and stay updated on the latest gear and techniques.

Remember that safety is paramount, and having the right gear and knowledge is essential. Always be aware of your surroundings and the weather conditions, and respect local regulations. With consistent practice and a positive attitude, you’ll likely find yourself progressing quickly in this thrilling water sport.

How to rig a spinning rod

Rigging a fishing pole involves setting up the necessary components for a specific fishing technique or target species. The exact rigging process can vary based on the type of fishing you’re doing (e.g., freshwater, saltwater, baitcasting, spinning, etc.) and the specific fishing technique you plan to use. Here, I’ll provide a basic guide for rigging a spinning rod, which is one of the most common setups for recreational fishing.

Rigging a Spinning Rod:

1. Gather Your Equipment:

  • Spinning rod and reel
  • Fishing line (appropriate for your target species and conditions)
  • Hook(s)
  • Sinkers or weights
  • Swivels (optional)
  • Bobber (if fishing with a float)

2. Choose the Right Fishing Line:

  • Select a fishing line that matches the recommended line strength for your rod and reel. The recommended line strength is usually marked on the rod.

3. Thread the Line:

  • Open the bail (the wire arm on the spinning reel) and pass the fishing line through the rod guides starting from the tip.

4. Attach the Reel:

  • Close the bail and secure the line to the reel spool using an arbor knot or any other suitable knot.

5. Add a Leader (Optional):

  • Some anglers like to attach a leader to the main fishing line for specific conditions or target species. Use a swivel to connect the leader to the main line, and tie your terminal tackle to the other end of the leader.

6. Attach the Terminal Tackle:

  • Tie your preferred terminal tackle to the end of the line. This may include:
    • Hooks: Tie your selected fishing hook using a suitable knot (e.g., improved clinch knot, Palomar knot).
    • Sinkers: Use split-shot sinkers or other types of weights to adjust your bait’s depth in the water.
    • Bobber: If you’re using a float, attach it above your hook(s) using the appropriate knot.

7. Bait Up:

  • Add your chosen bait to the hook. This can be live bait, artificial lures, or other bait options depending on your target species.

8. Adjust the Drag:

  • Set the drag on your reel according to the specifications provided by the manufacturer. The drag controls how much resistance a fish feels when pulling on the line.

9. Test Your Rig:

  • Make a few practice casts to ensure that the line flows smoothly from the reel, and the rod and reel combination are balanced.

Remember, specific fishing scenarios may require different rigging techniques. If you’re unsure about the best rig for your situation, consider seeking advice from local anglers, fishing guides, or experts who are familiar with the specific area or species you’re targeting. Additionally, be aware of and adhere to local fishing regulations and guidelines.

Tips for hiking in the desert

baja california sur desert and ocean

Hiking in the desert can be a unique and challenging experience due to the harsh conditions and extreme temperatures. Here are some tips to ensure a safe and enjoyable desert hiking adventure:

  1. Hydration is Key: Desert environments can be extremely dry, leading to rapid dehydration. Bring plenty of water and drink regularly, even if you don’t feel thirsty. Aim for at least one gallon (3.8 liters) per person per day.
  2. Choose the Right Time: Hike during the cooler parts of the day, typically early morning or late afternoon. Avoid hiking during the peak heat of the day to reduce the risk of heat-related illnesses.
  3. Protect Yourself from the Sun: Wear lightweight, light-colored, and breathable clothing to reflect the sun. Use a wide-brimmed hat, sunglasses, and apply sunscreen with a high SPF rating to protect your skin.
  4. Plan Your Route: Inform someone about your hiking plans, including your route and expected return time. Stick to established trails to minimize your impact on the environment, and use a map or GPS device to navigate.
  5. Pack Essential Supplies: Carry a well-stocked backpack with essentials such as a first aid kit, extra water, high-energy snacks, a multi-tool, a map, and a compass. Be prepared for emergencies.
  6. Watch for Wildlife: Be aware of the local wildlife, especially venomous snakes. Stay on designated trails and avoid reaching into areas where you can’t see, such as rocks or bushes.
  7. Be Mindful of the Terrain: Desert terrain can be rocky and uneven. Wear sturdy hiking boots to protect your feet, and be cautious when navigating uneven surfaces.
  8. Know the Signs of Heat-Related Illness: Familiarize yourself with the symptoms of heat-related illnesses such as heat exhaustion and heatstroke. If you or someone in your group shows signs of overheating, take immediate action by finding shade and cooling down.
  9. Carry a Headlamp or Flashlight: Hiking in the desert during the early morning or late afternoon may mean low light conditions. Carry a reliable headlamp or flashlight in case your hike extends into the evening.
  10. Respect the Environment: Leave no trace – pack out all your trash and avoid disturbing plants and wildlife. Be mindful of the delicate desert ecosystem.
  11. Check the Weather Forecast: Desert weather can be unpredictable, so check the forecast before heading out. Be prepared for sudden changes and carry additional layers if needed.

Always be well-prepared and use your common sense when hiking in the desert. If you’re unfamiliar with the area, consider hiring a guide or joining a guided tour for a safer and more informative experience.

How to catch a dorado

Catching a dorado fish, also known as mahi-mahi or dolphinfish, can be an exciting experience. Dorado are known for their vibrant colors, acrobatic jumps, and delicious taste. Here are some general tips on how to catch dorado:

  1. Location: Dorado are often found in warm oceanic waters, particularly around floating debris, weed lines, and current edges. Look for areas with a combination of these features, as they attract baitfish and, in turn, dorado.
  2. Bait: Dorado are opportunistic feeders and will go after a variety of bait. Common choices include live or rigged ballyhoo, mullet, squid, and small tuna. They are also known to hit artificial lures such as plastic skirts, feathers, and trolling lures.
  3. Trolling: Dorado are often caught while trolling. Use a trolling spread with a mix of lures and baits at different depths and distances from the boat. Keep your speed between 5 to 10 knots, adjusting as needed based on conditions.
  4. Colorful Lures: Dorado are attracted to bright colors. Use lures and baits in shades of green, yellow, blue, and pink. Adding a bit of flash to your setup can also increase your chances of attracting dorado.
  5. Chumming: If you spot dorado around floating debris, you can increase your chances by using a bit of chum. Tossing small pieces of bait into the water can attract dorado to your location.
  6. Gear: Use medium to heavy tackle with a strong, flexible rod and a reel with a smooth drag. Dorado are known for their acrobatics, so be prepared for energetic fights.
  7. Be Ready for Action: Dorado can be aggressive and may strike suddenly. Keep a close eye on your baits and be ready to react when a dorado hits. They are known for their aerial displays, so prepare for jumps and runs.
  8. Handling: Once you’ve successfully hooked a dorado, be cautious when bringing it onboard. They are known for their dazzling colors and can be quite powerful even out of the water. Use a gaff or a landing net to secure the fish.

Remember to check and adhere to local fishing regulations and guidelines, and practice responsible and sustainable fishing techniques. Additionally, local knowledge from experienced anglers or fishing guides in the area can be invaluable for a successful dorado fishing trip.

Where should you scuba dive in Baja?

Baja California, Mexico, offers some incredible scuba diving opportunities with its diverse marine life and stunning underwater landscapes. Here are some popular scuba diving locations in Baja:

  1. Cabo San Lucas: Located at the southern tip of the Baja Peninsula, Cabo San Lucas is known for its crystal-clear waters and vibrant marine life. Popular dive sites include Land’s End, where you can find sand falls and swim-throughs, and the Cabo Pulmo Marine Park, a protected area with a thriving coral reef.
  2. La Paz: The capital of Baja California Sur, La Paz, is a gateway to the Sea of Cortez, often referred to as the “Aquarium of the World.” This region is famous for encounters with sea lions, whale sharks, and large schools of fish. Espiritu Santo Island is a popular destination for its clear waters and diverse marine ecosystems.
  3. Loreto: Further north in the Sea of Cortez, Loreto offers a more tranquil diving experience. The area is known for its rich biodiversity, including various species of fish, rays, and dolphins. Divers can explore the marine life around the Loreto Bay National Marine Park.
  4. Bahía de los Ángeles: This area, located on the eastern side of the Baja Peninsula along the Sea of Cortez, is known for its unique underwater landscapes and diverse marine species. It’s a less crowded destination, providing a more secluded diving experience.
  5. Cedros Island: For more experienced divers, Cedros Island offers challenging dive sites with strong currents and deep waters. The island is known for encounters with sharks, including hammerheads and white tips.

Before planning your scuba diving trip, ensure that you are aware of local regulations, safety guidelines, and the best times to visit for optimal diving conditions. Additionally, consider diving with reputable dive operators who prioritize safety and environmental conservation.

How do you start learning to kiteboard?

Learning to kiteboard can be an exciting and challenging adventure. Here’s a step-by-step guide to help you get started:

  1. Take a Lesson:
    • Enroll in a certified kiteboarding school with experienced instructors. They will teach you the fundamentals, safety measures, and essential skills.
    • Professional guidance is crucial to ensure you learn the correct techniques and safety protocols from the beginning.
  2. Understand the Basics:
    • Learn about the wind window, power zones, and how the kite generates power.
    • Understand the safety systems and emergency procedures for depowering the kite.
  3. Practice with a Trainer Kite:
    • Start with a small, two-line trainer kite to get a feel for basic kite control on land.
    • Practice flying the kite in various wind conditions to develop muscle memory and control.
  4. Body Dragging:
    • Progress to body dragging in the water. This involves using the kite to pull you through the water without the board.
    • Focus on maintaining control of the kite while being dragged through the water.
  5. Water Start:
    • Learn how to water start, where you use the kite to pull yourself onto the board and start riding.
    • Practice getting up on the board and riding short distances.
  6. Board Control and Riding:
    • Work on controlling the board while riding and maintaining balance.
    • Learn to edge the board to control speed and direction.
  7. Upwind Riding:
    • Master riding upwind to increase your control over the board and make it easier to return to your starting point.
  8. Self-Rescue Techniques:
    • Understand self-rescue techniques in case you encounter difficulties while on the water.
  9. Continued Practice:
    • Kiteboarding requires practice to improve skills and build confidence. Spend as much time on the water as possible.
  10. Stay Safe:
    • Always follow safety guidelines and pay attention to weather conditions.
    • Respect local regulations and guidelines for kiteboarding in specific areas.
  11. Join the Community:
    • Connect with other kiteboarders, both online and locally. Join forums or groups where you can exchange tips, experiences, and information.

Remember that kiteboarding involves both physical and mental skills, so be patient and persistent. It’s also crucial to have the right equipment and safety gear. Always prioritize safety and adhere to the guidelines provided by your instructor and the kiteboarding community.